Sending Data
Overview
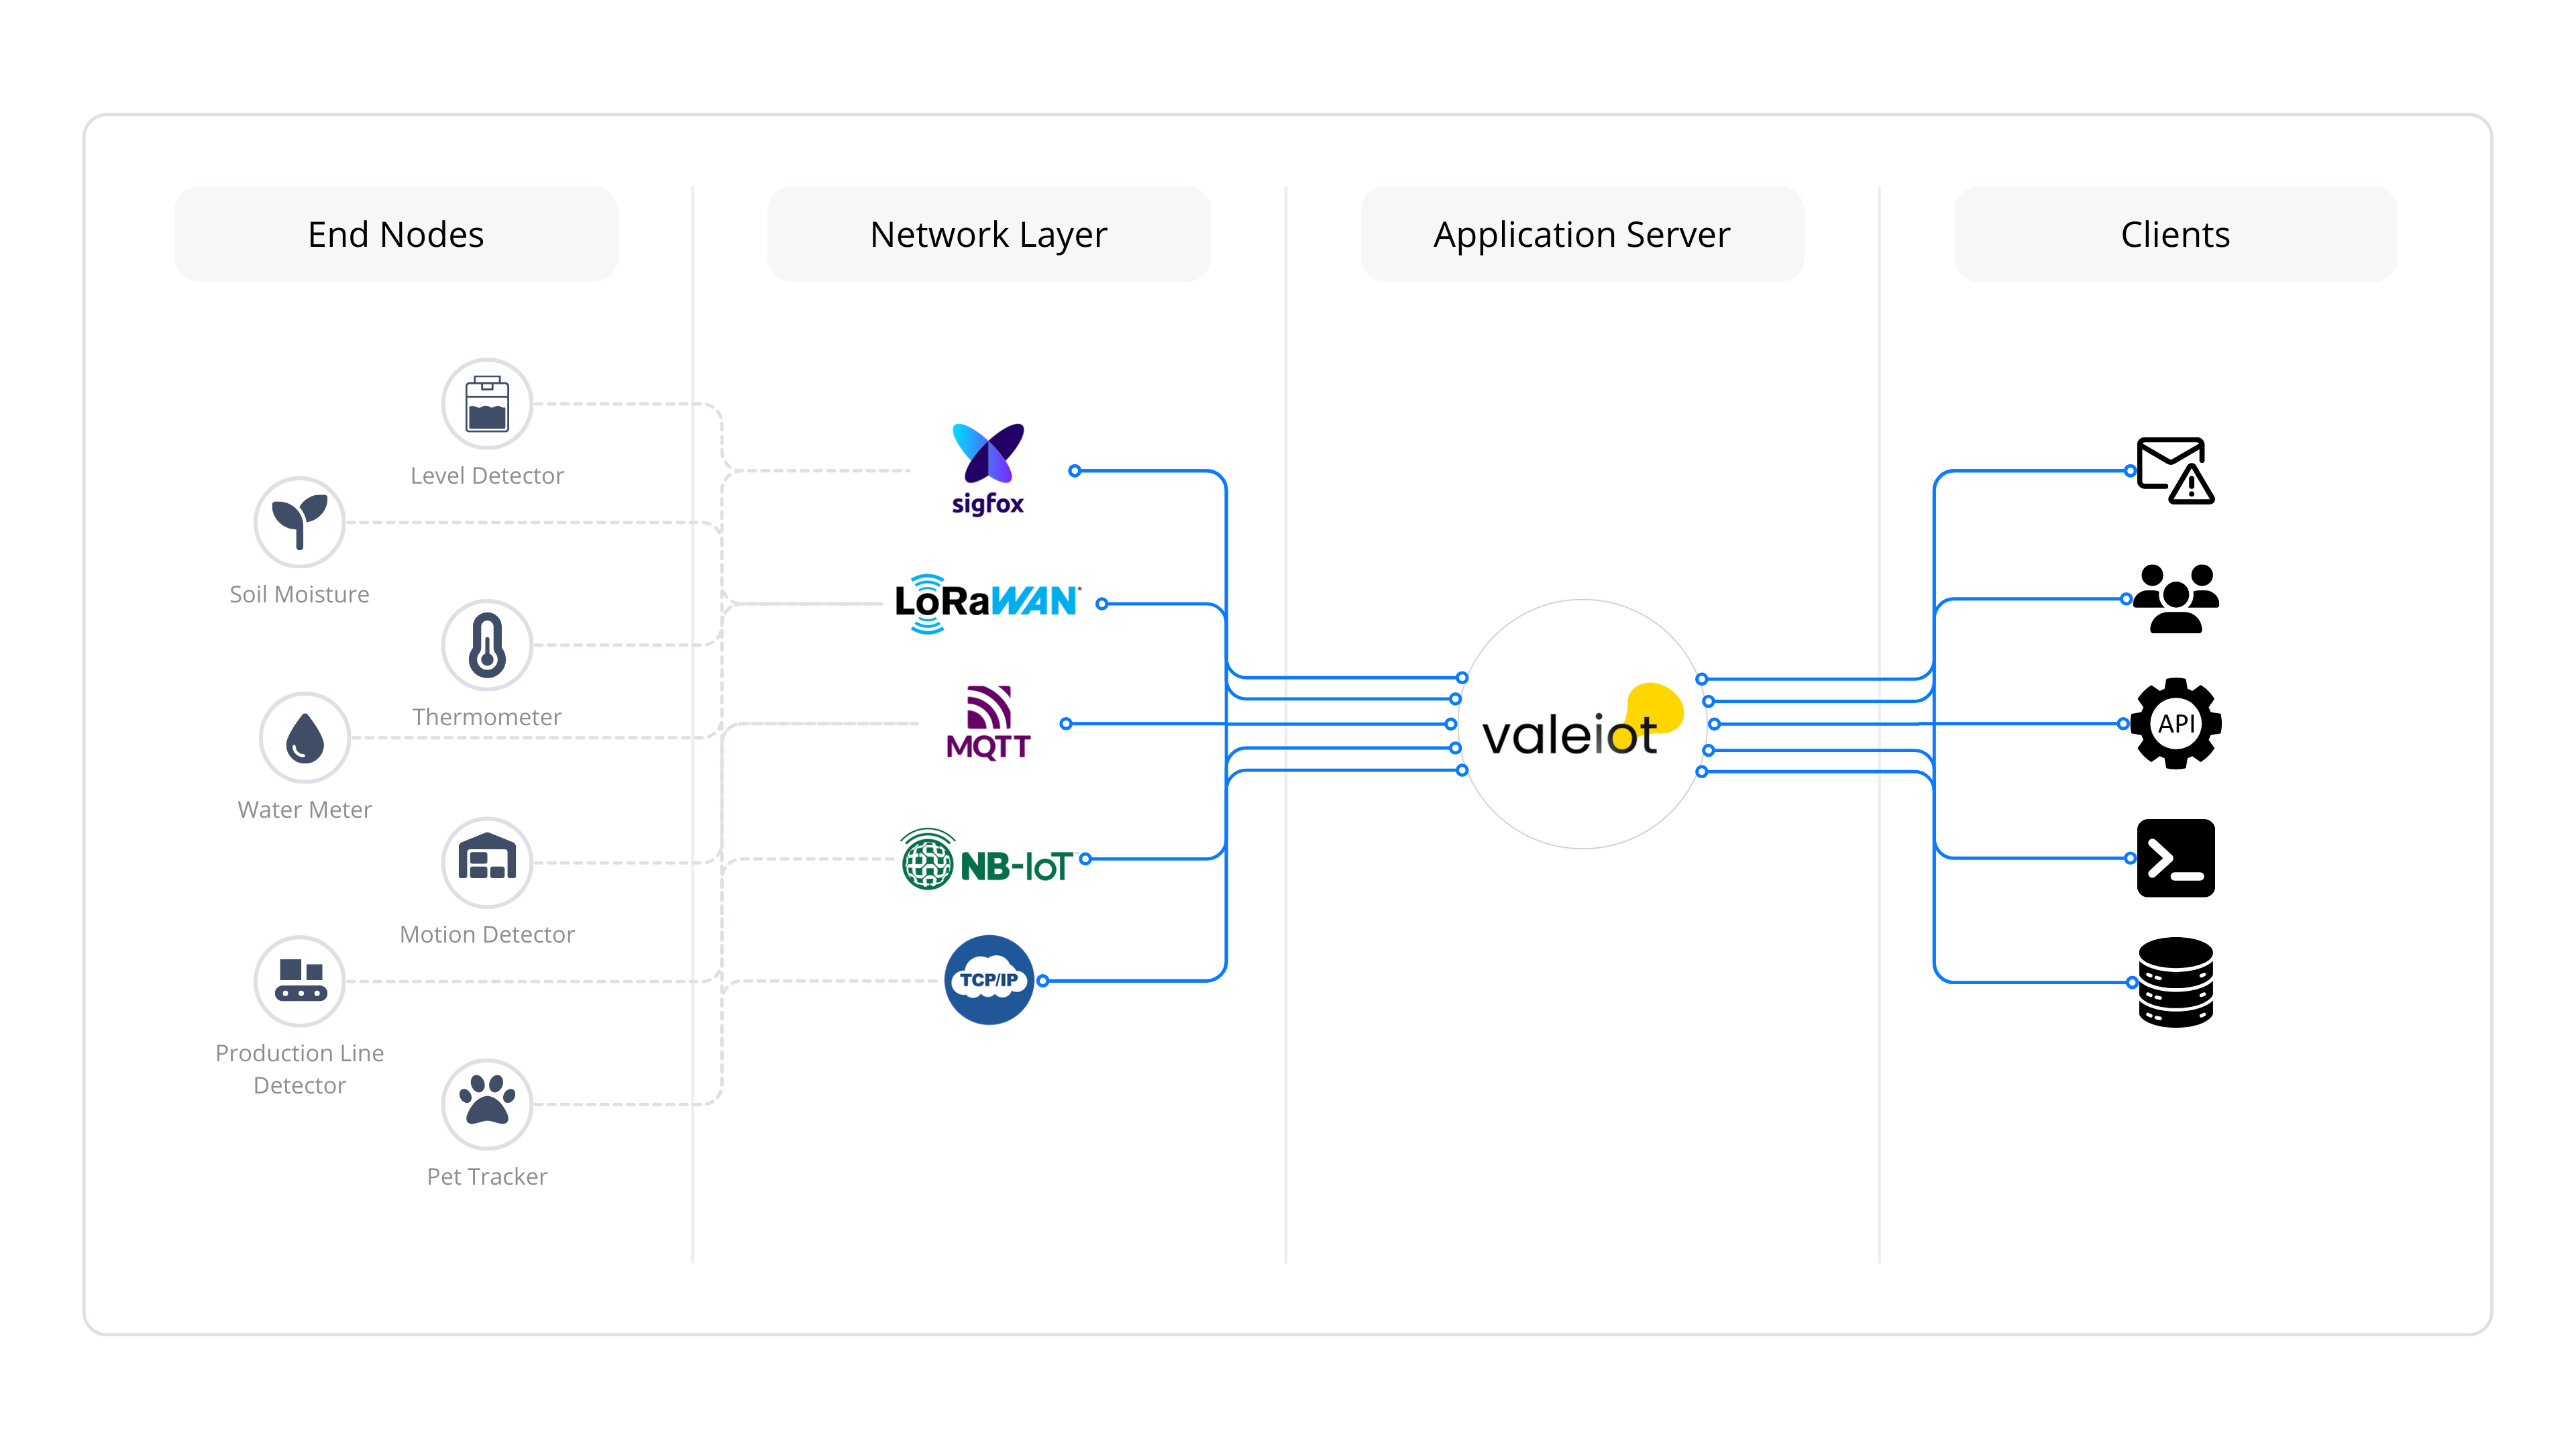
Devices in Valeiot can send data using multiple communication protocols.
Depending on the device connectivity and network infrastructure, different methods can be used to ingest data into the platform.
HTTPS
By default, devices in Valeiot support the HTTPS protocol directly.
Refer to the documentation section HTTPS to learn how to configure your device and send data using HTTPS requests.
MQTT
Devices in Valeiot also support the MQTT protocol directly.
Refer to the documentation section MQTT to learn how to configure your device and publish data using MQTT.
LoRaWAN
LoRaWAN use cases typically depend on a Network Server, which acts as a security layer and manages message translation between LoRaWAN devices and external platforms.
Regardless of the Network Server being used, a middleware is required to translate the payload from the Network Server format into the Valeiot data format.
We currently provide support for the following middleware:
If a middleware is not yet available for your Network Server, you can implement your own integration layer to bridge communication between the Network Server and Valeiot using the HTTPS or MQTT endpoints.
This middleware should be responsible for receiving the payload from the Network Server, translating it into the Valeiot Data Point format, and forwarding the data to the platform.
If you need assistance building the middleware or integrating your Network Server with Valeiot, contact our team at support@valeiot.com.
Cellular
For cellular-based devices, you can implement a custom middleware that receives data from the device or cellular network and translates it into requests compatible with Valeiot.
This middleware should act as a server responsible for converting incoming requests (regardless of their original format) into HTTPS or MQTT requests that follow the Valeiot data format.
TCP/IP
Devices communicating through TCP/IP protocols may also require a middleware layer.
In this case, the middleware should receive raw TCP/IP messages from the devices, process and translate them, and then forward the data to Valeiot using HTTPS or MQTT requests.
Other Communication Protocols
For any other communication protocol, a middleware layer will be required.
This middleware should be responsible for receiving the device data, translating it to the Valeiot data format, and sending it to the platform using HTTPS or MQTT.