Widget Configuration
Overview
Widgets allow you to display any data you need inside your dashboard. The widget library lets you choose from multiple widget types, each with its own behavior and configuration options.
Configuring a widget involves three main sections: Query, Display and Layout.
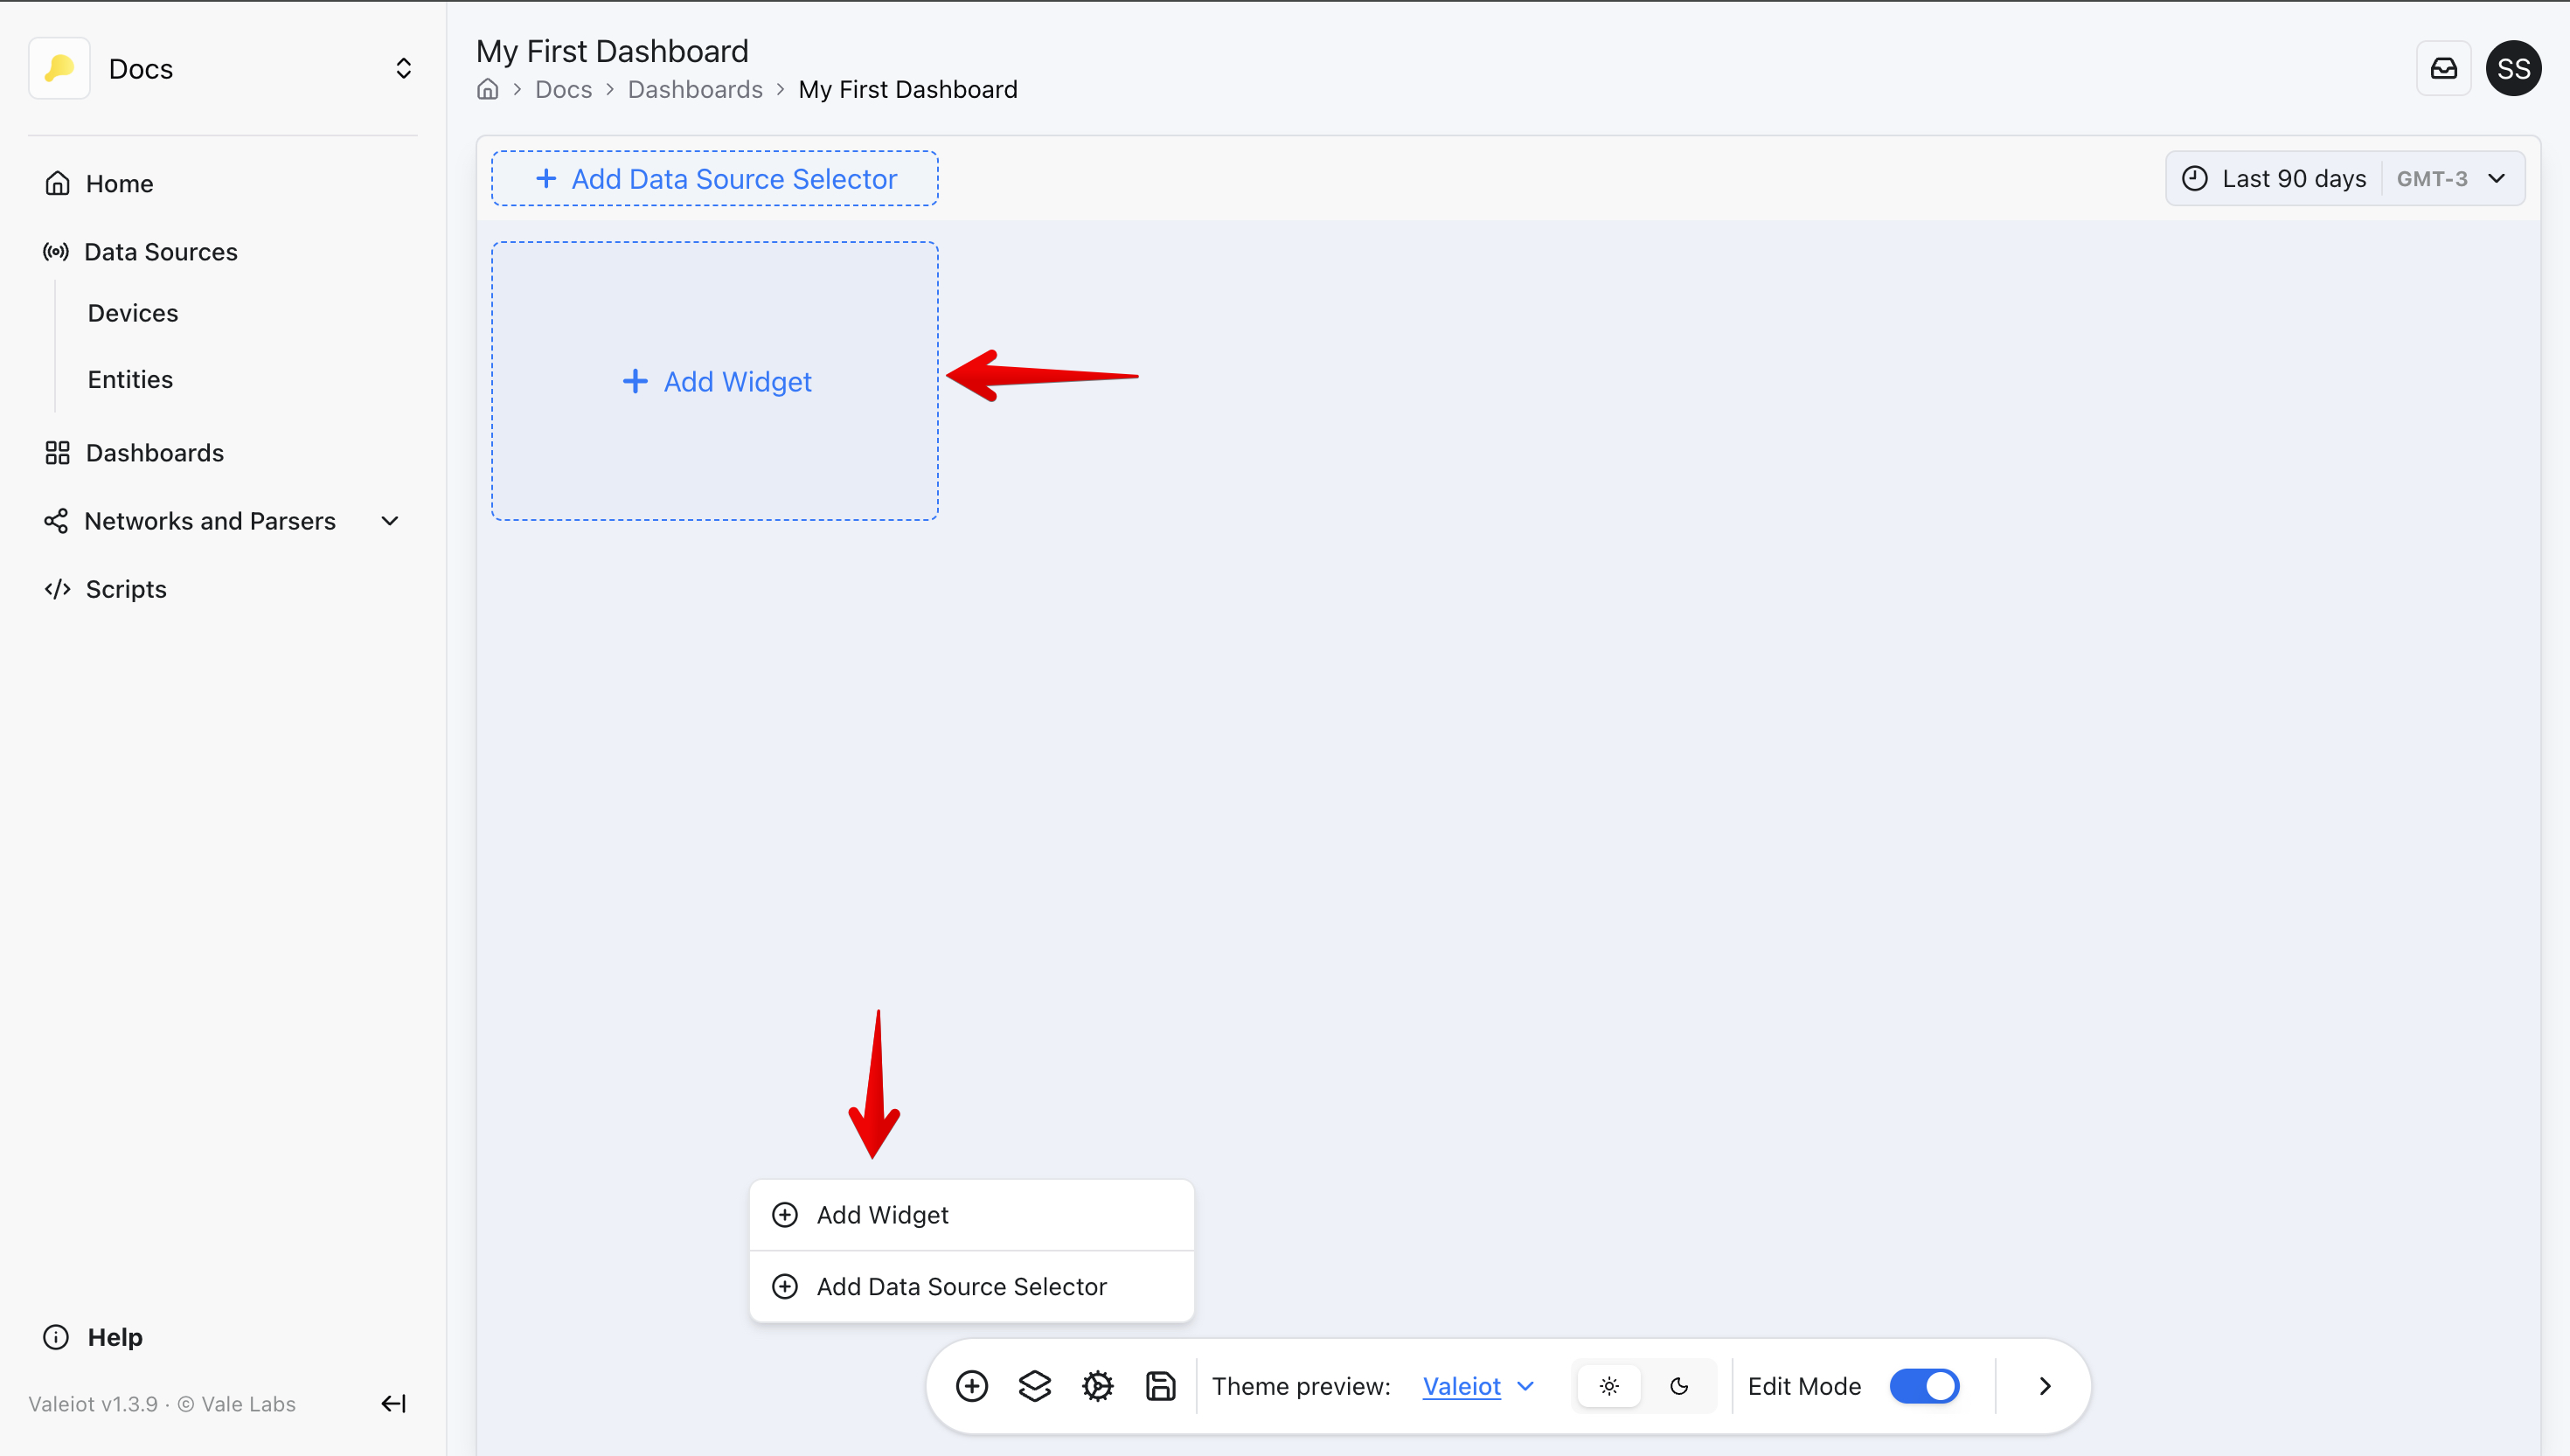
Within a dashboard, click at add widget to follow each section bellow.
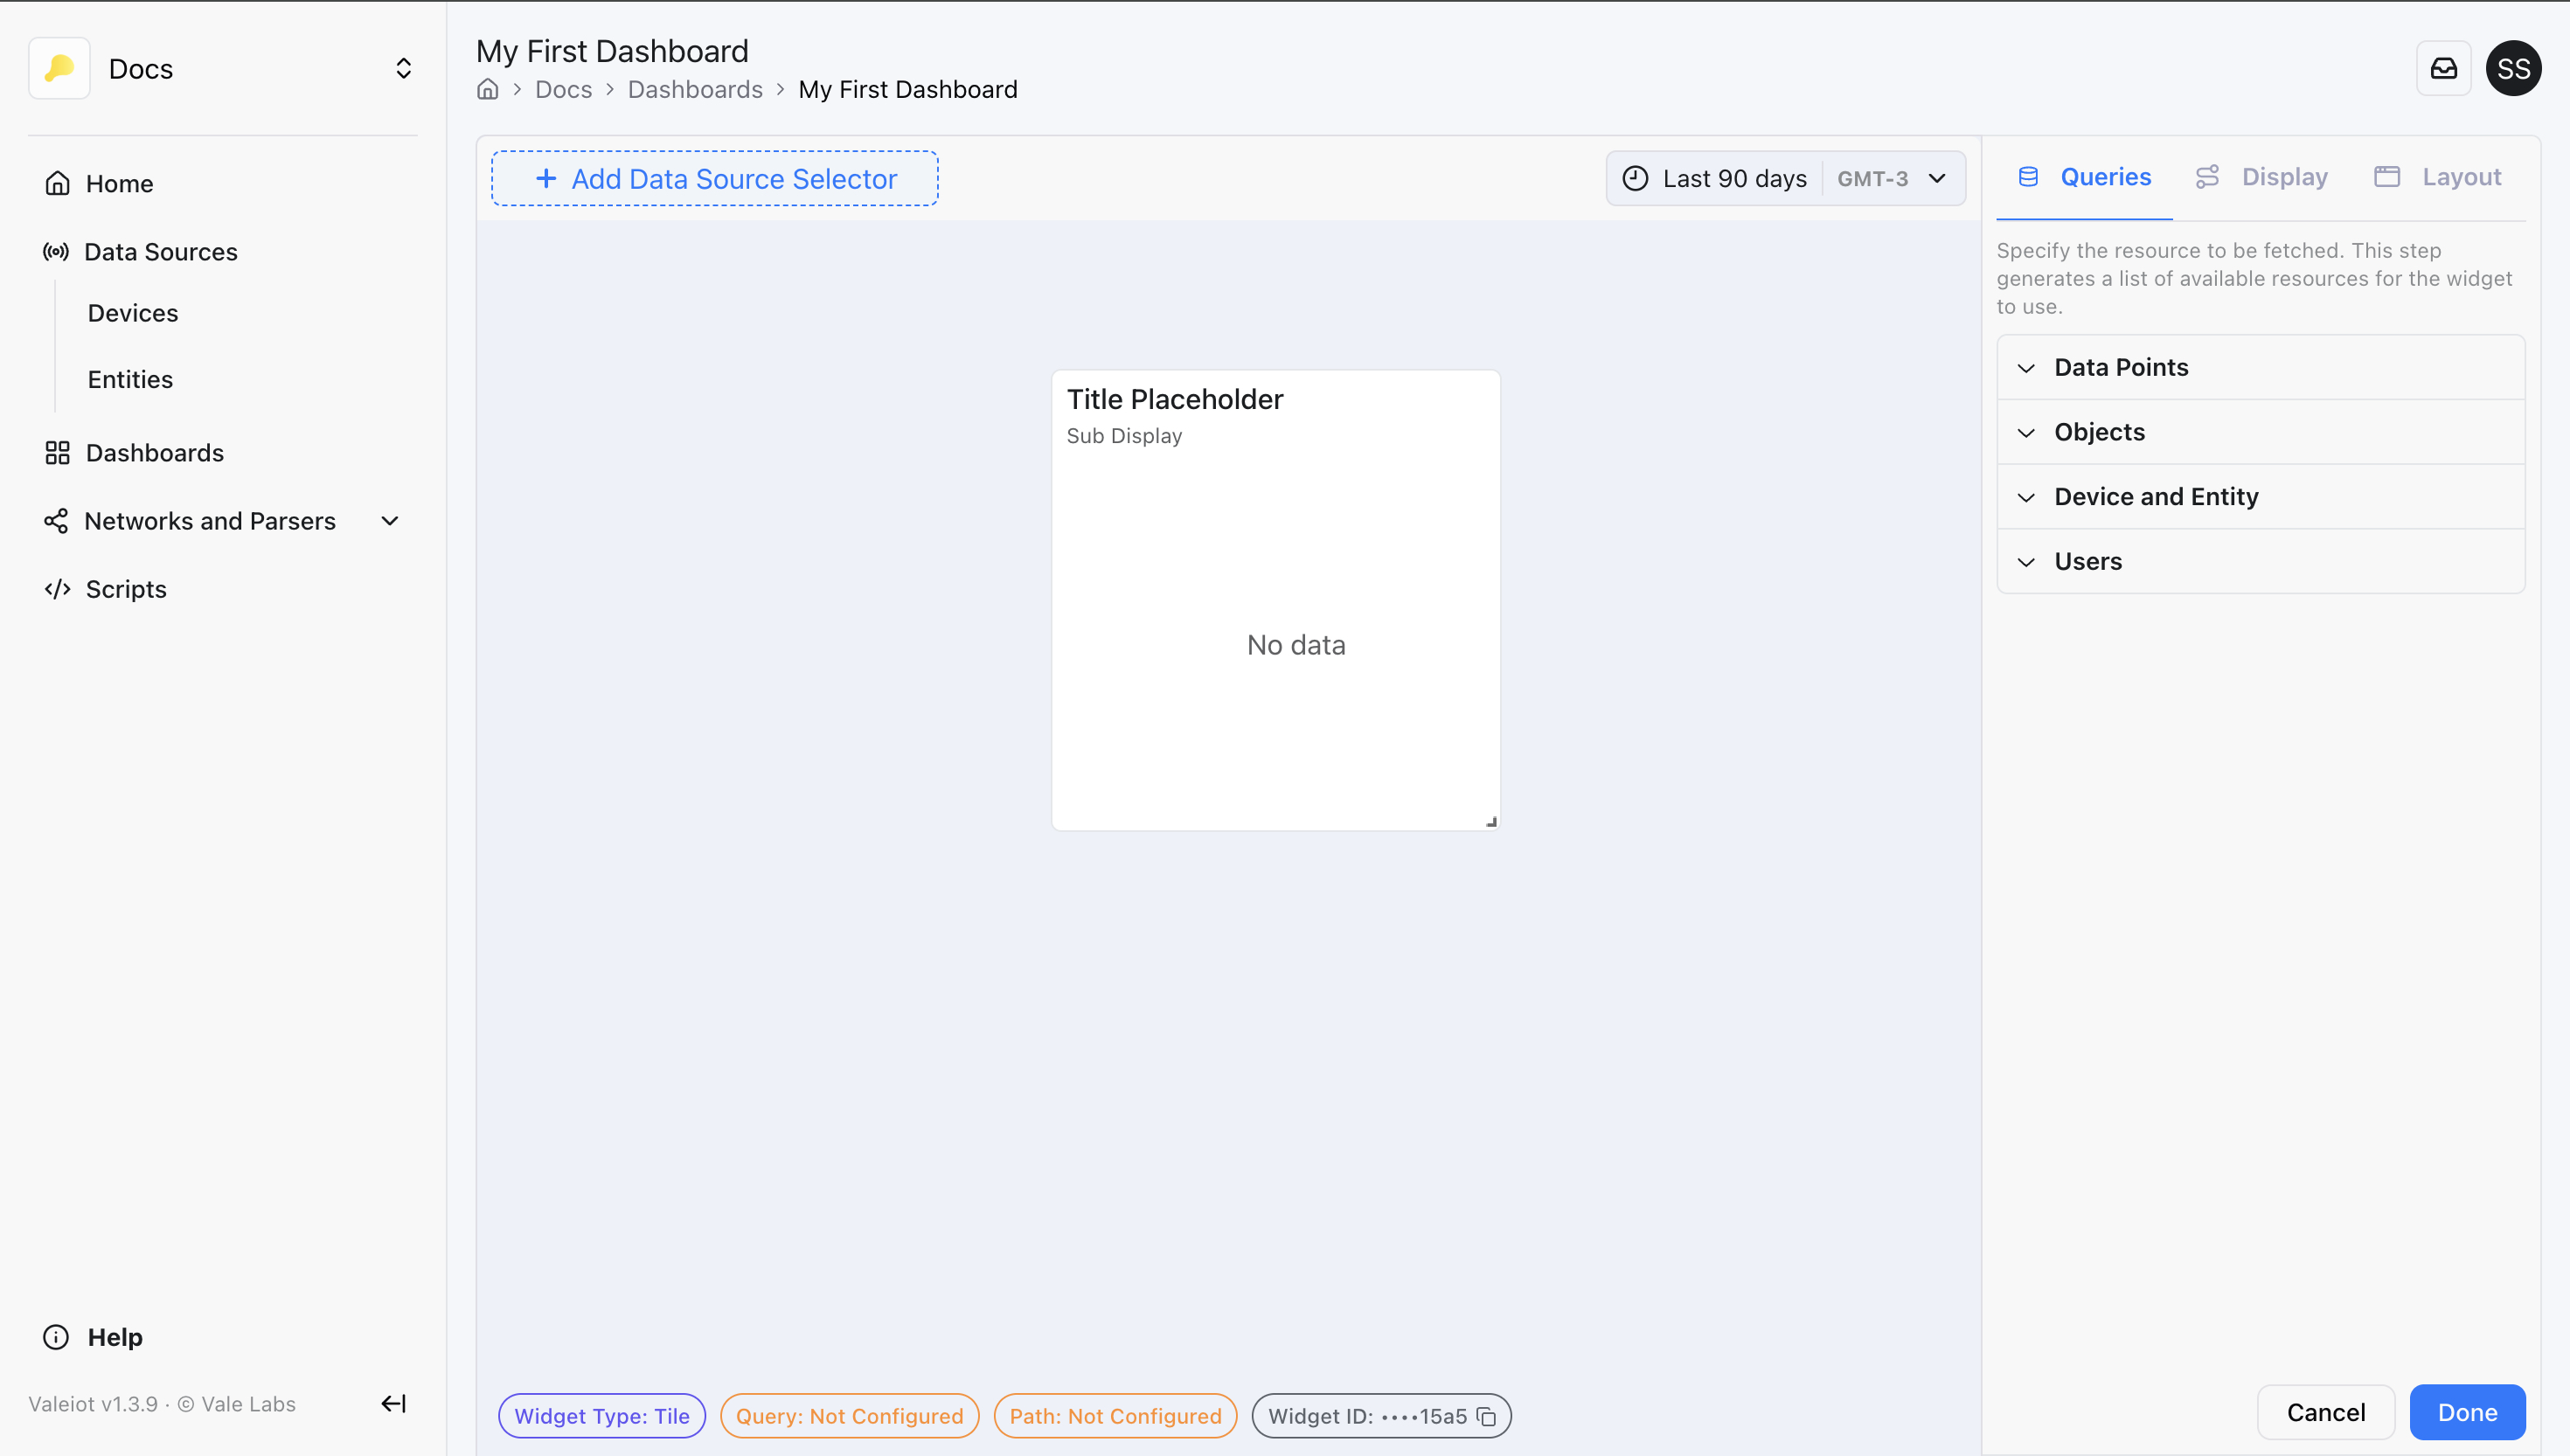
Section 1: Query
In the Query section, you define how the widget will fetch data. Select the resource you want, create a query, and configure it according to your needs.
You can create multiple queries — they will be listed as A, B, C, and so on.
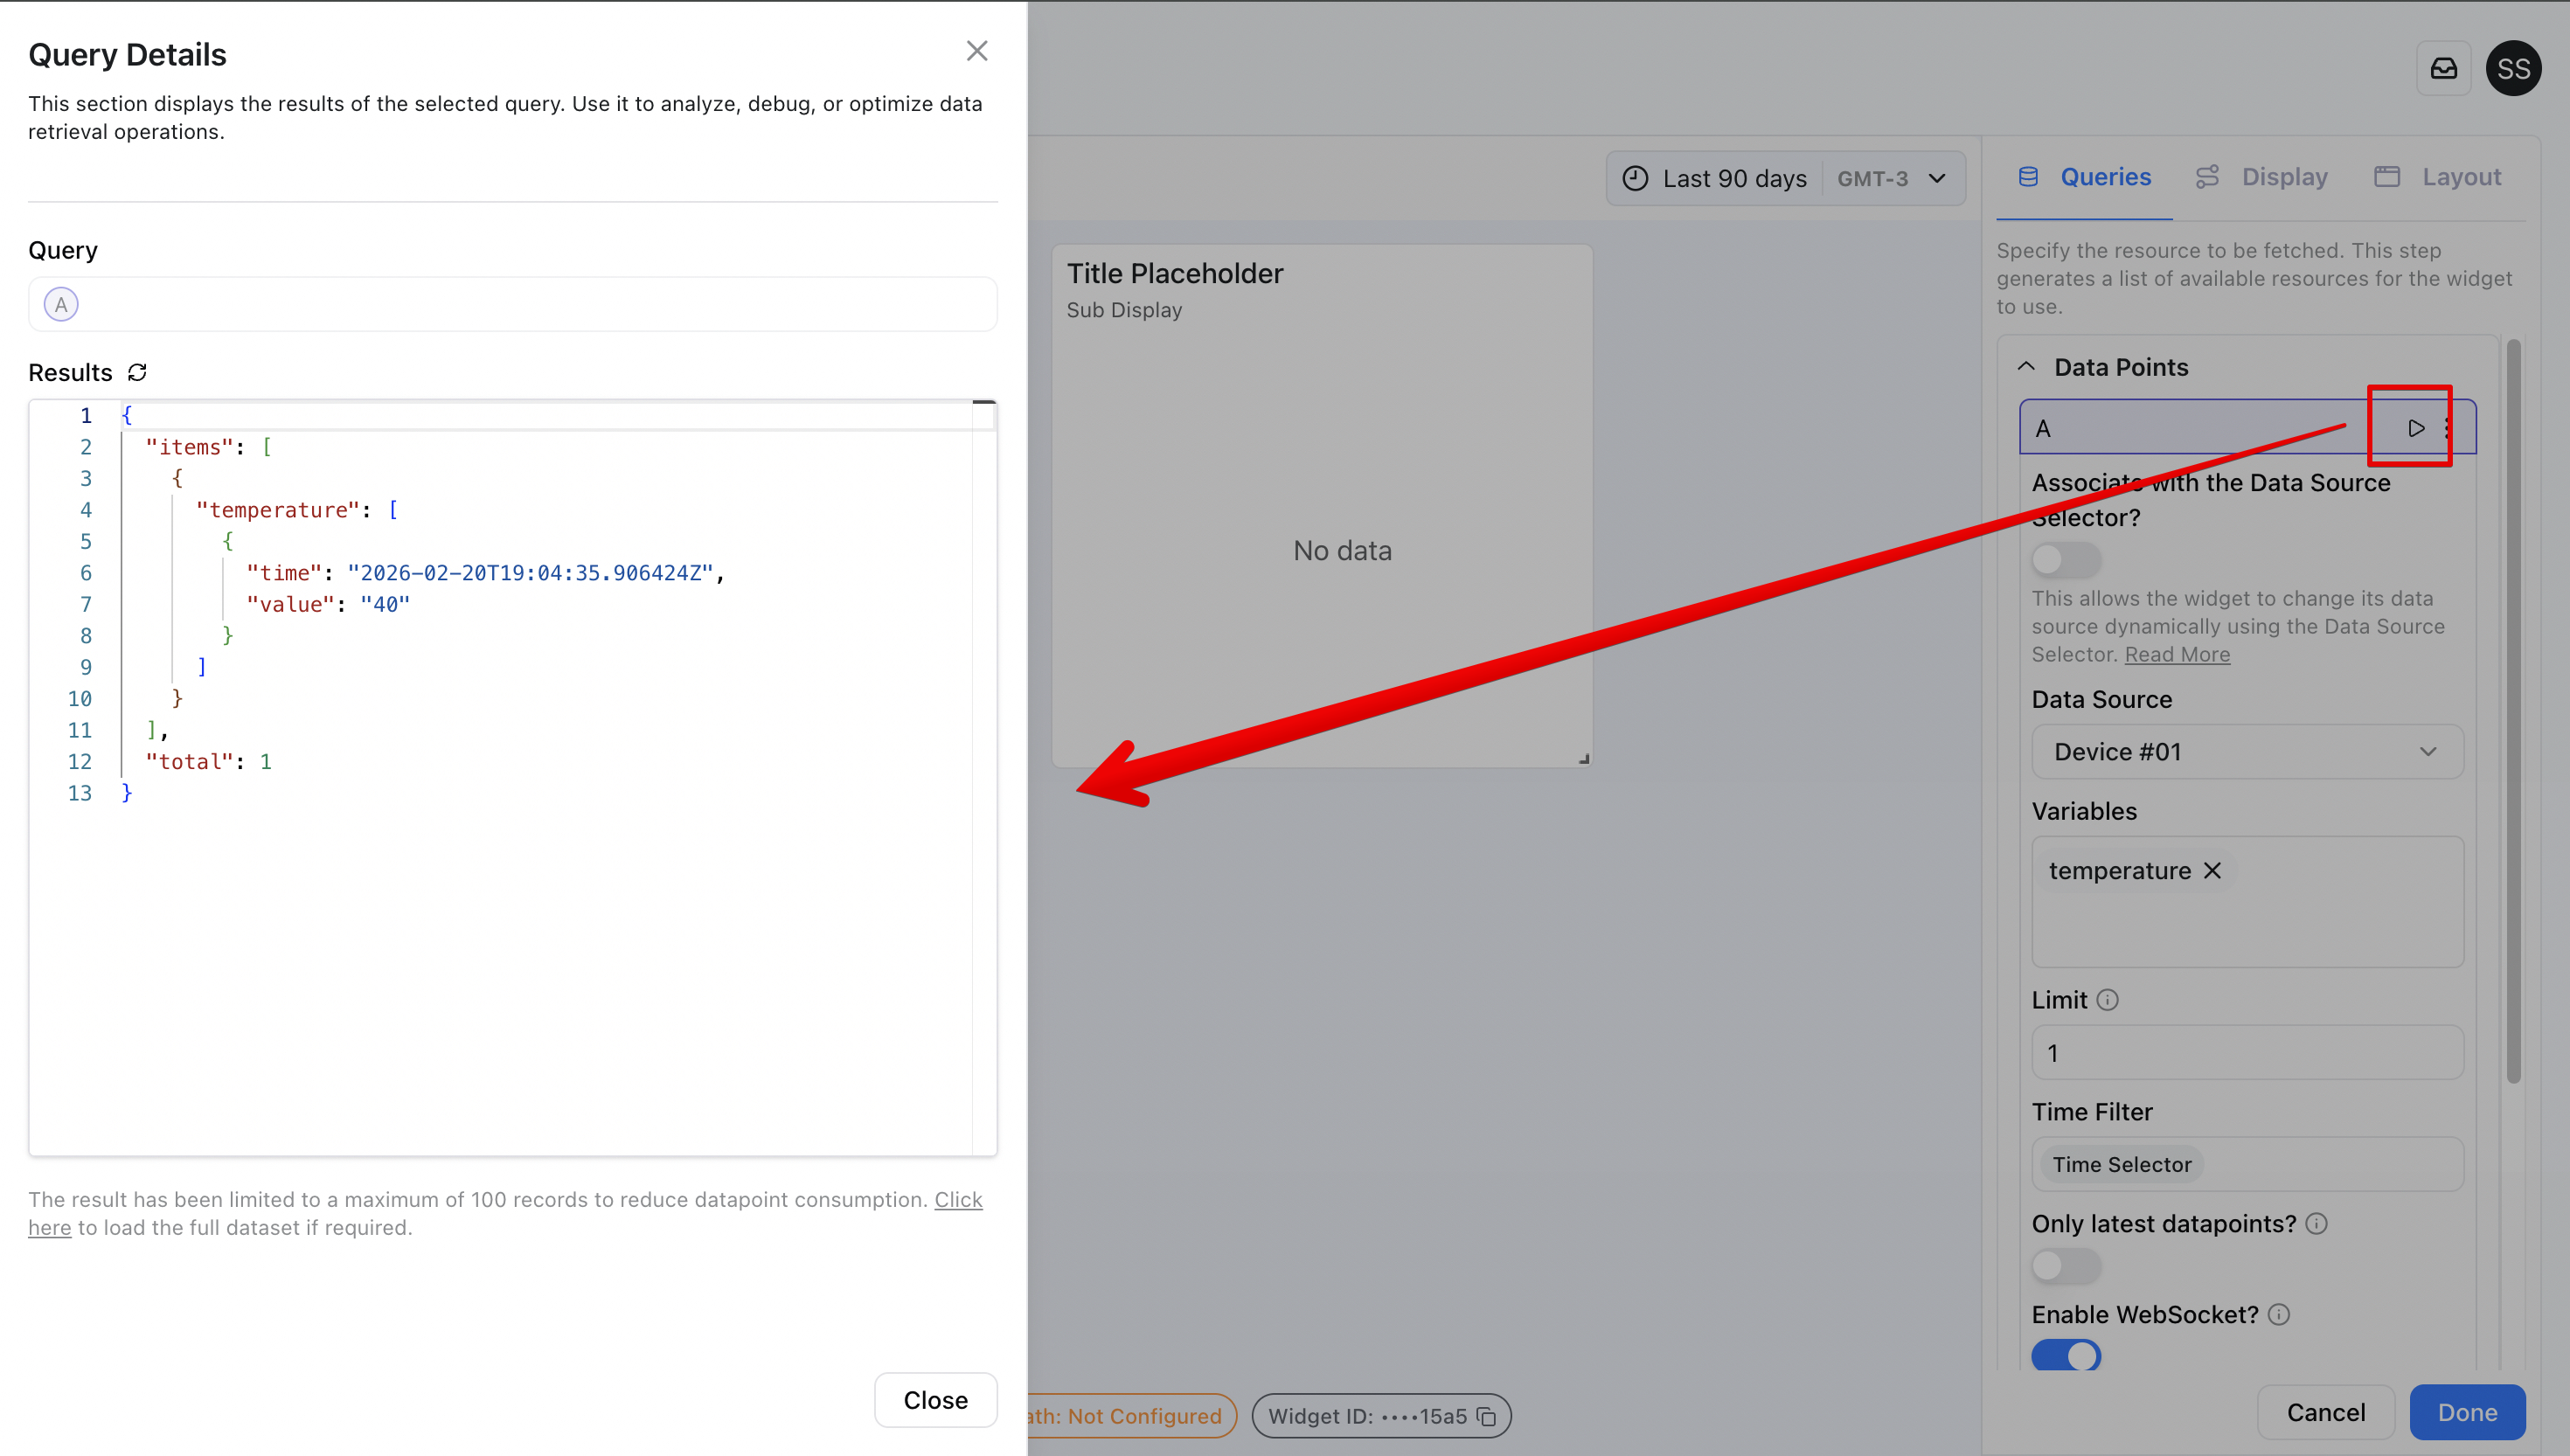
In the example below, temperature information is queried to display in a Tile widget:
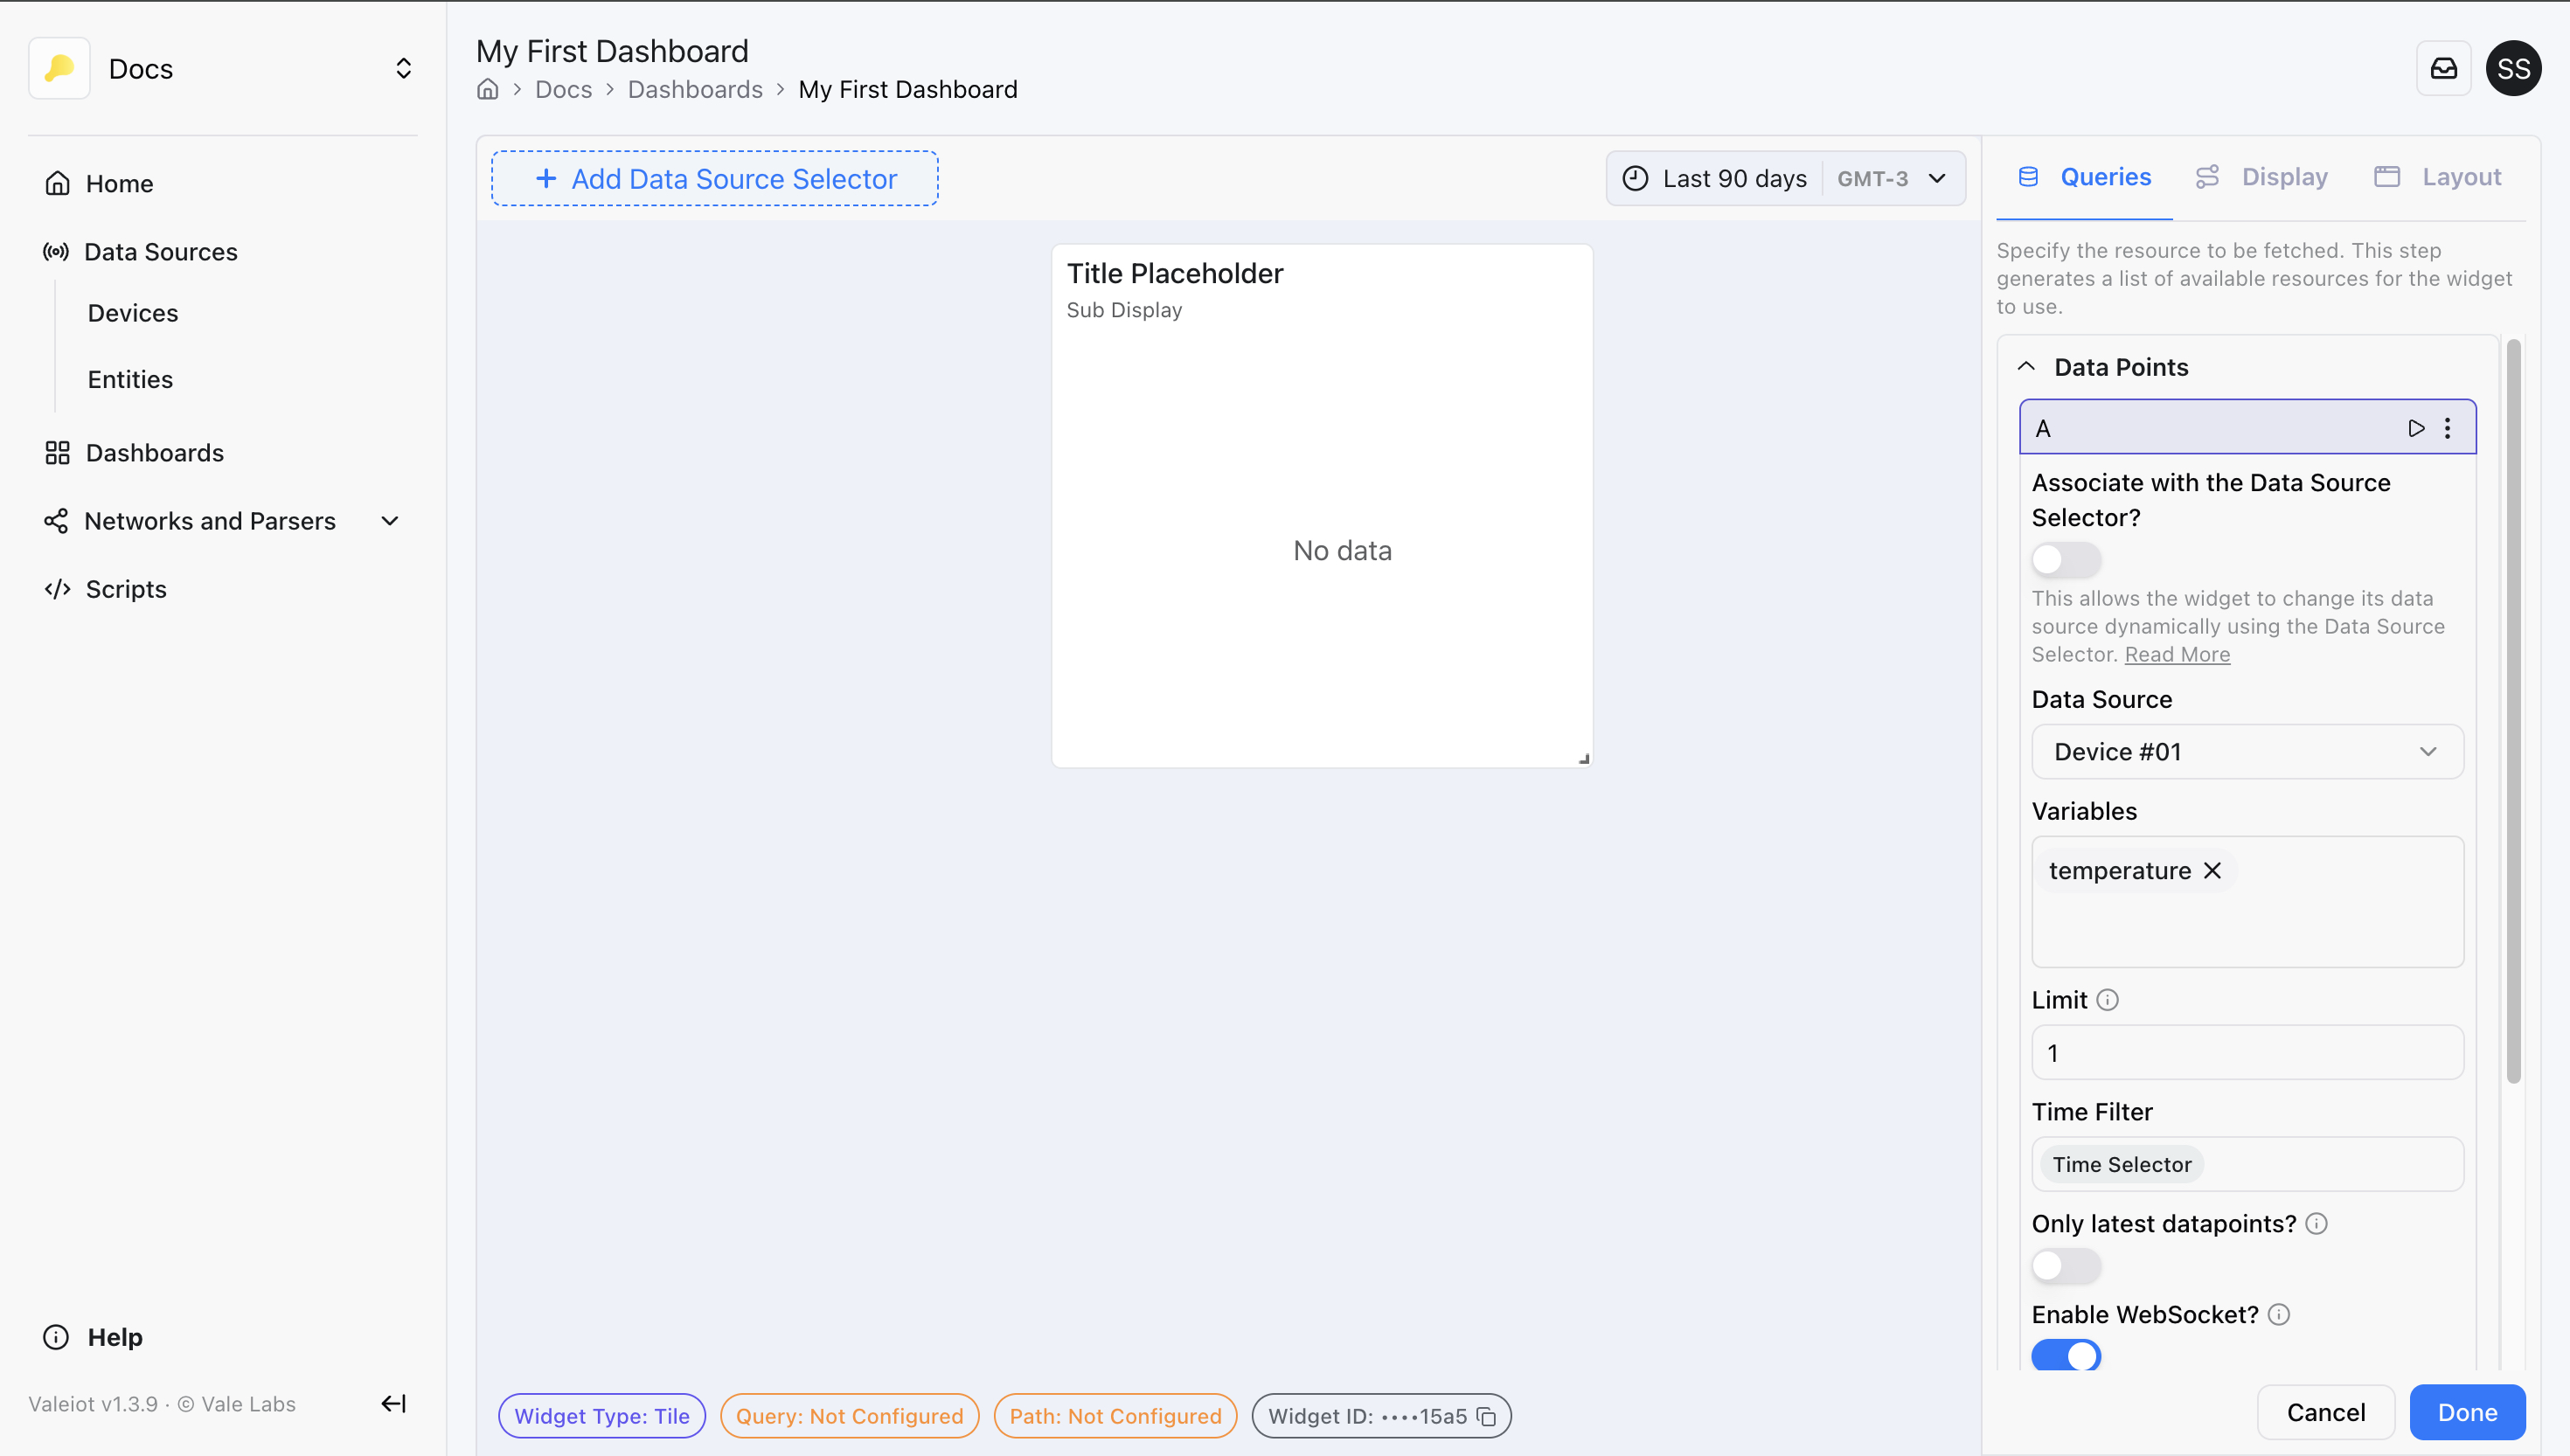
A query returns a list of items. After configuring it, you can click in the "play" button to run the query and verify what's being returned:
Once the query is set and the returned data is correct, you can proceed to Display.
Section 2: Display
The Display section determines which data from the query the widget will use to render.
The key configuration here is defining the path to the information you want to display.
- Choose a query.
- Define the path expression.
- Extract data using JSONPath RFC 9535 (Query Expressions for JSON).
Single-value widgets expect exactly one value.
If your path returns a list with multiple values, only the last item will be displayed.
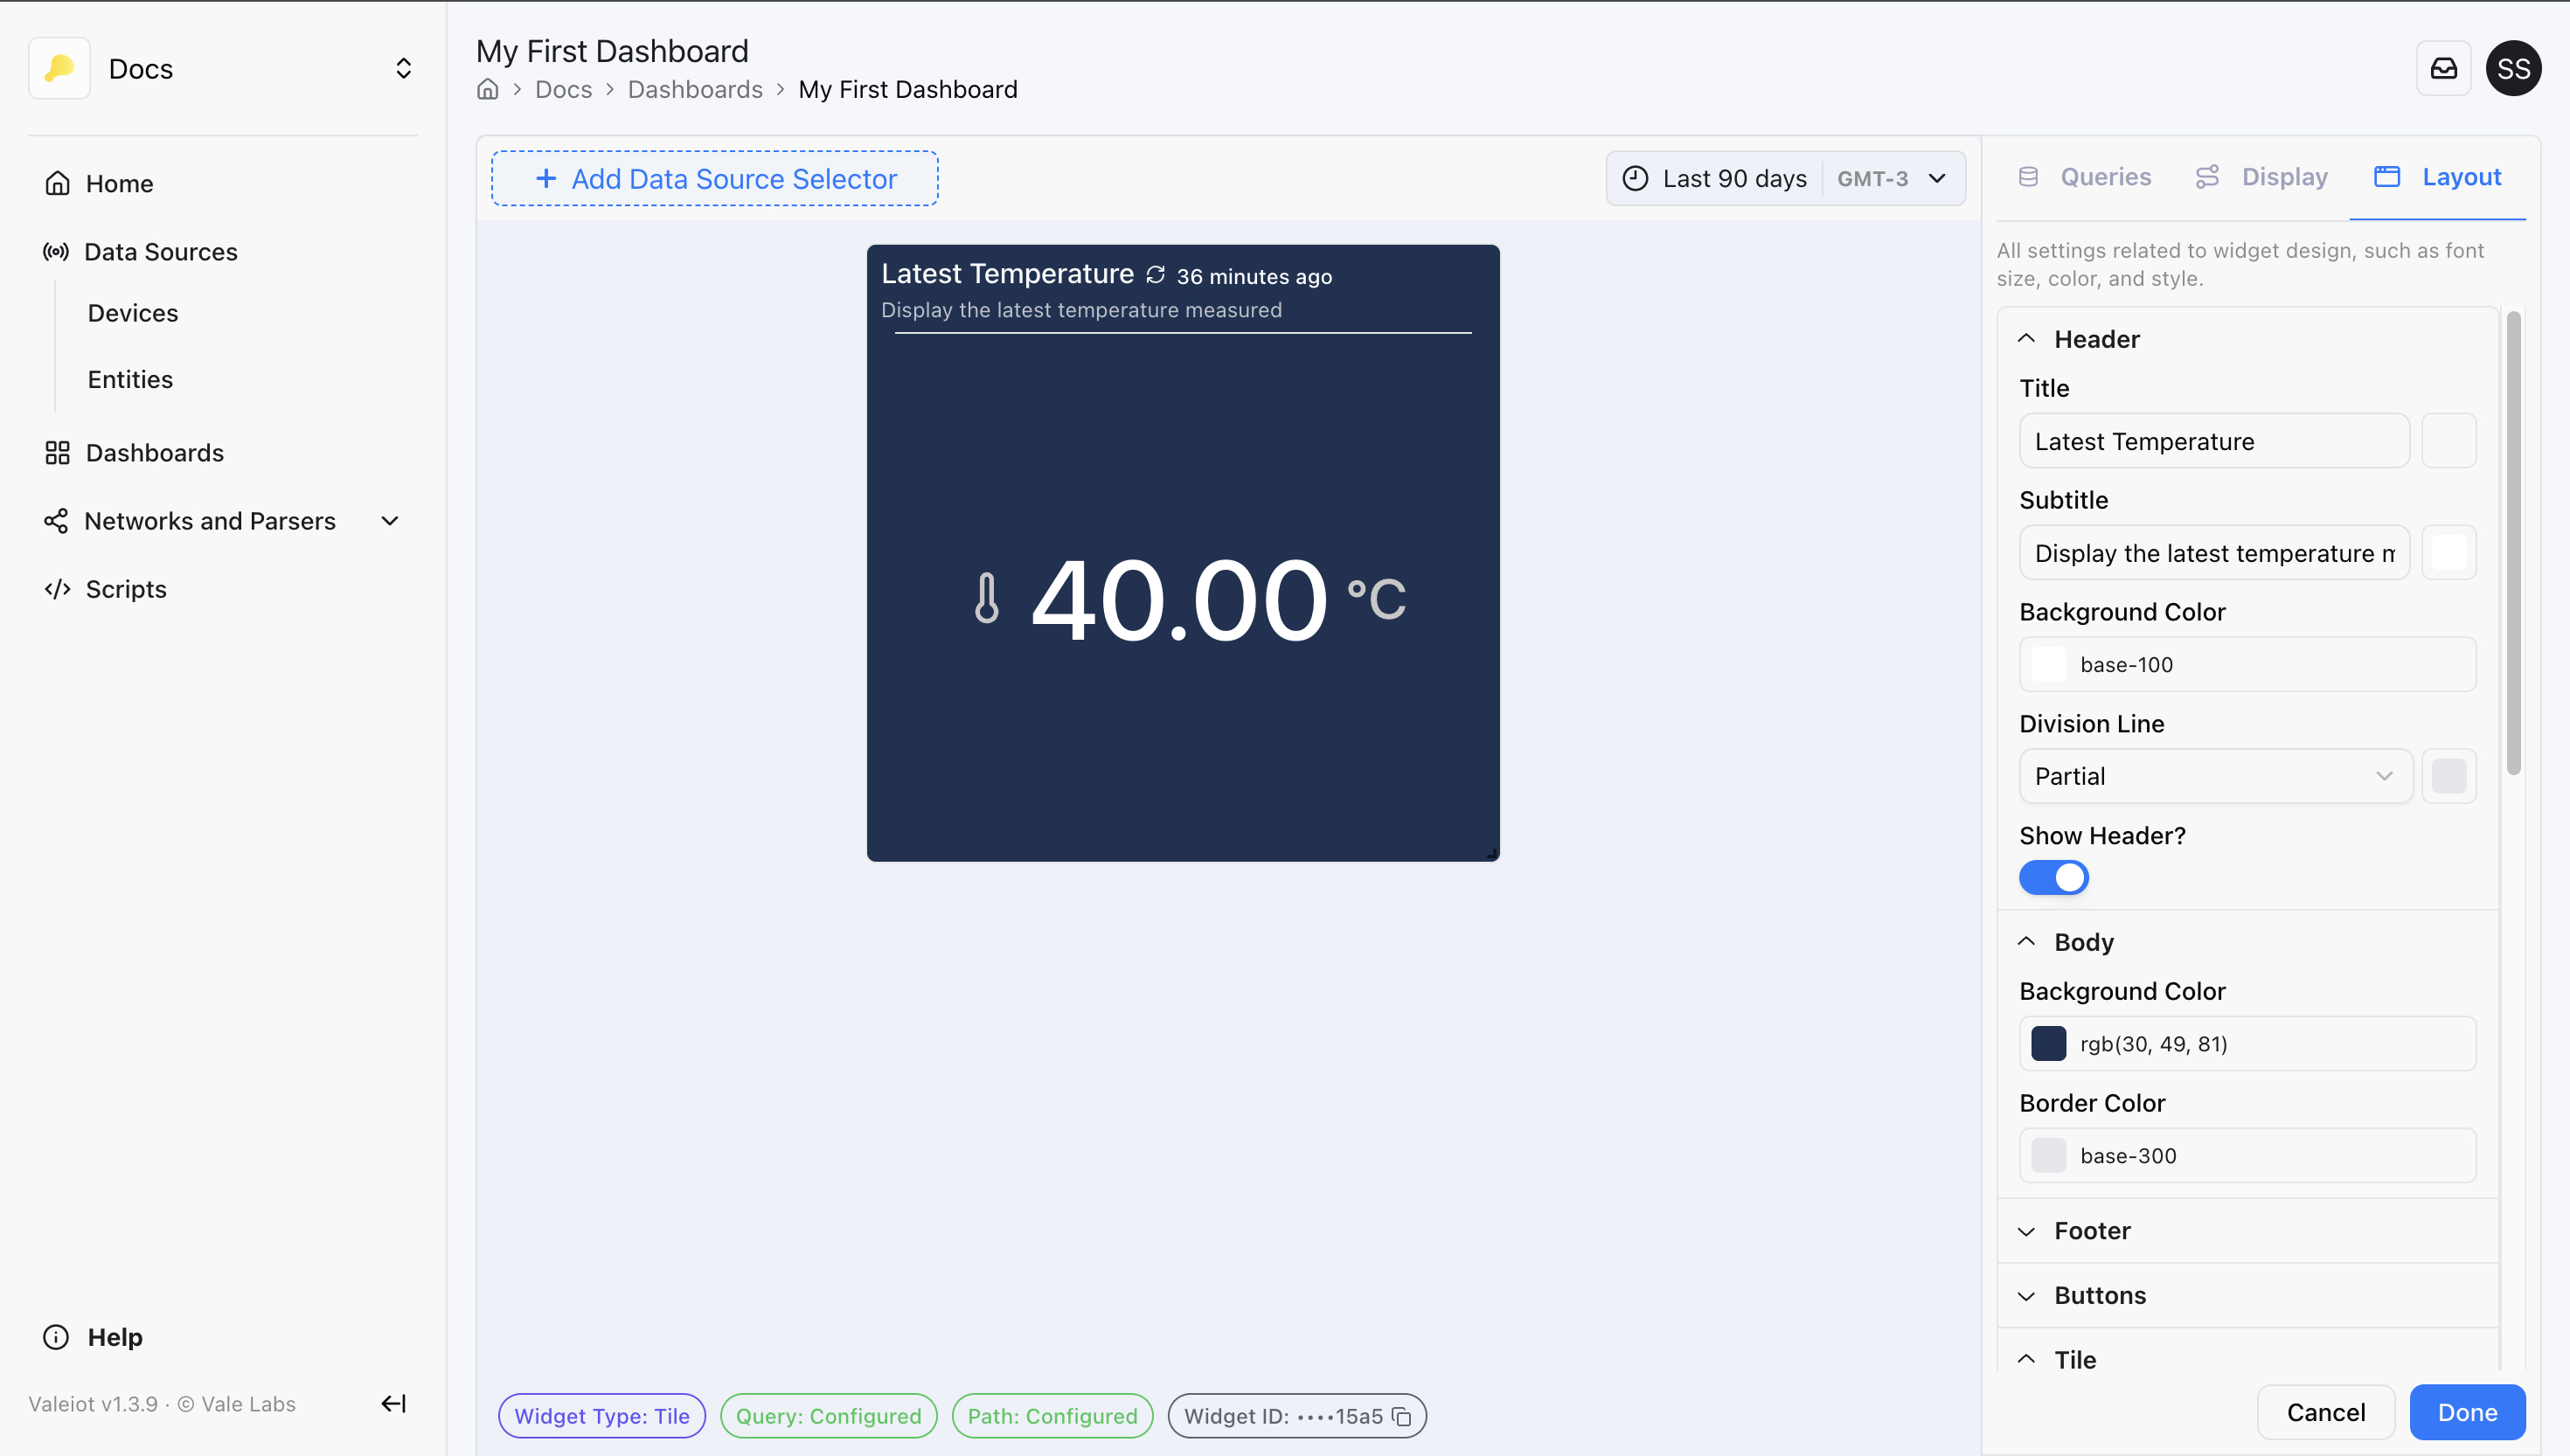
Section 3: Layout
The Layout section defines the widget’s structural settings, such as header, body, and footer.
Here you can update the title, adjust colors, and customize several visual aspects.