MQTT
Overview
Valeiot provides a built-in MQTT Broker to enable real-time communication between devices and the platform.
Using the MQTT protocol, devices can publish telemetry data and receive commands in a lightweight, scalable, and reliable way.
MQTT follows a publish/subscribe (pub/sub) model, where:
- A Client(device) connects to a Broker
- A client publishes messages to a Topic
- Other clients subscribe to topics to receive messages
- Messages can use different QoS (Quality of Service) levels
- Messages can be marked as Retained
- Connections can be secured using TLS
Sending Data to Valeiot
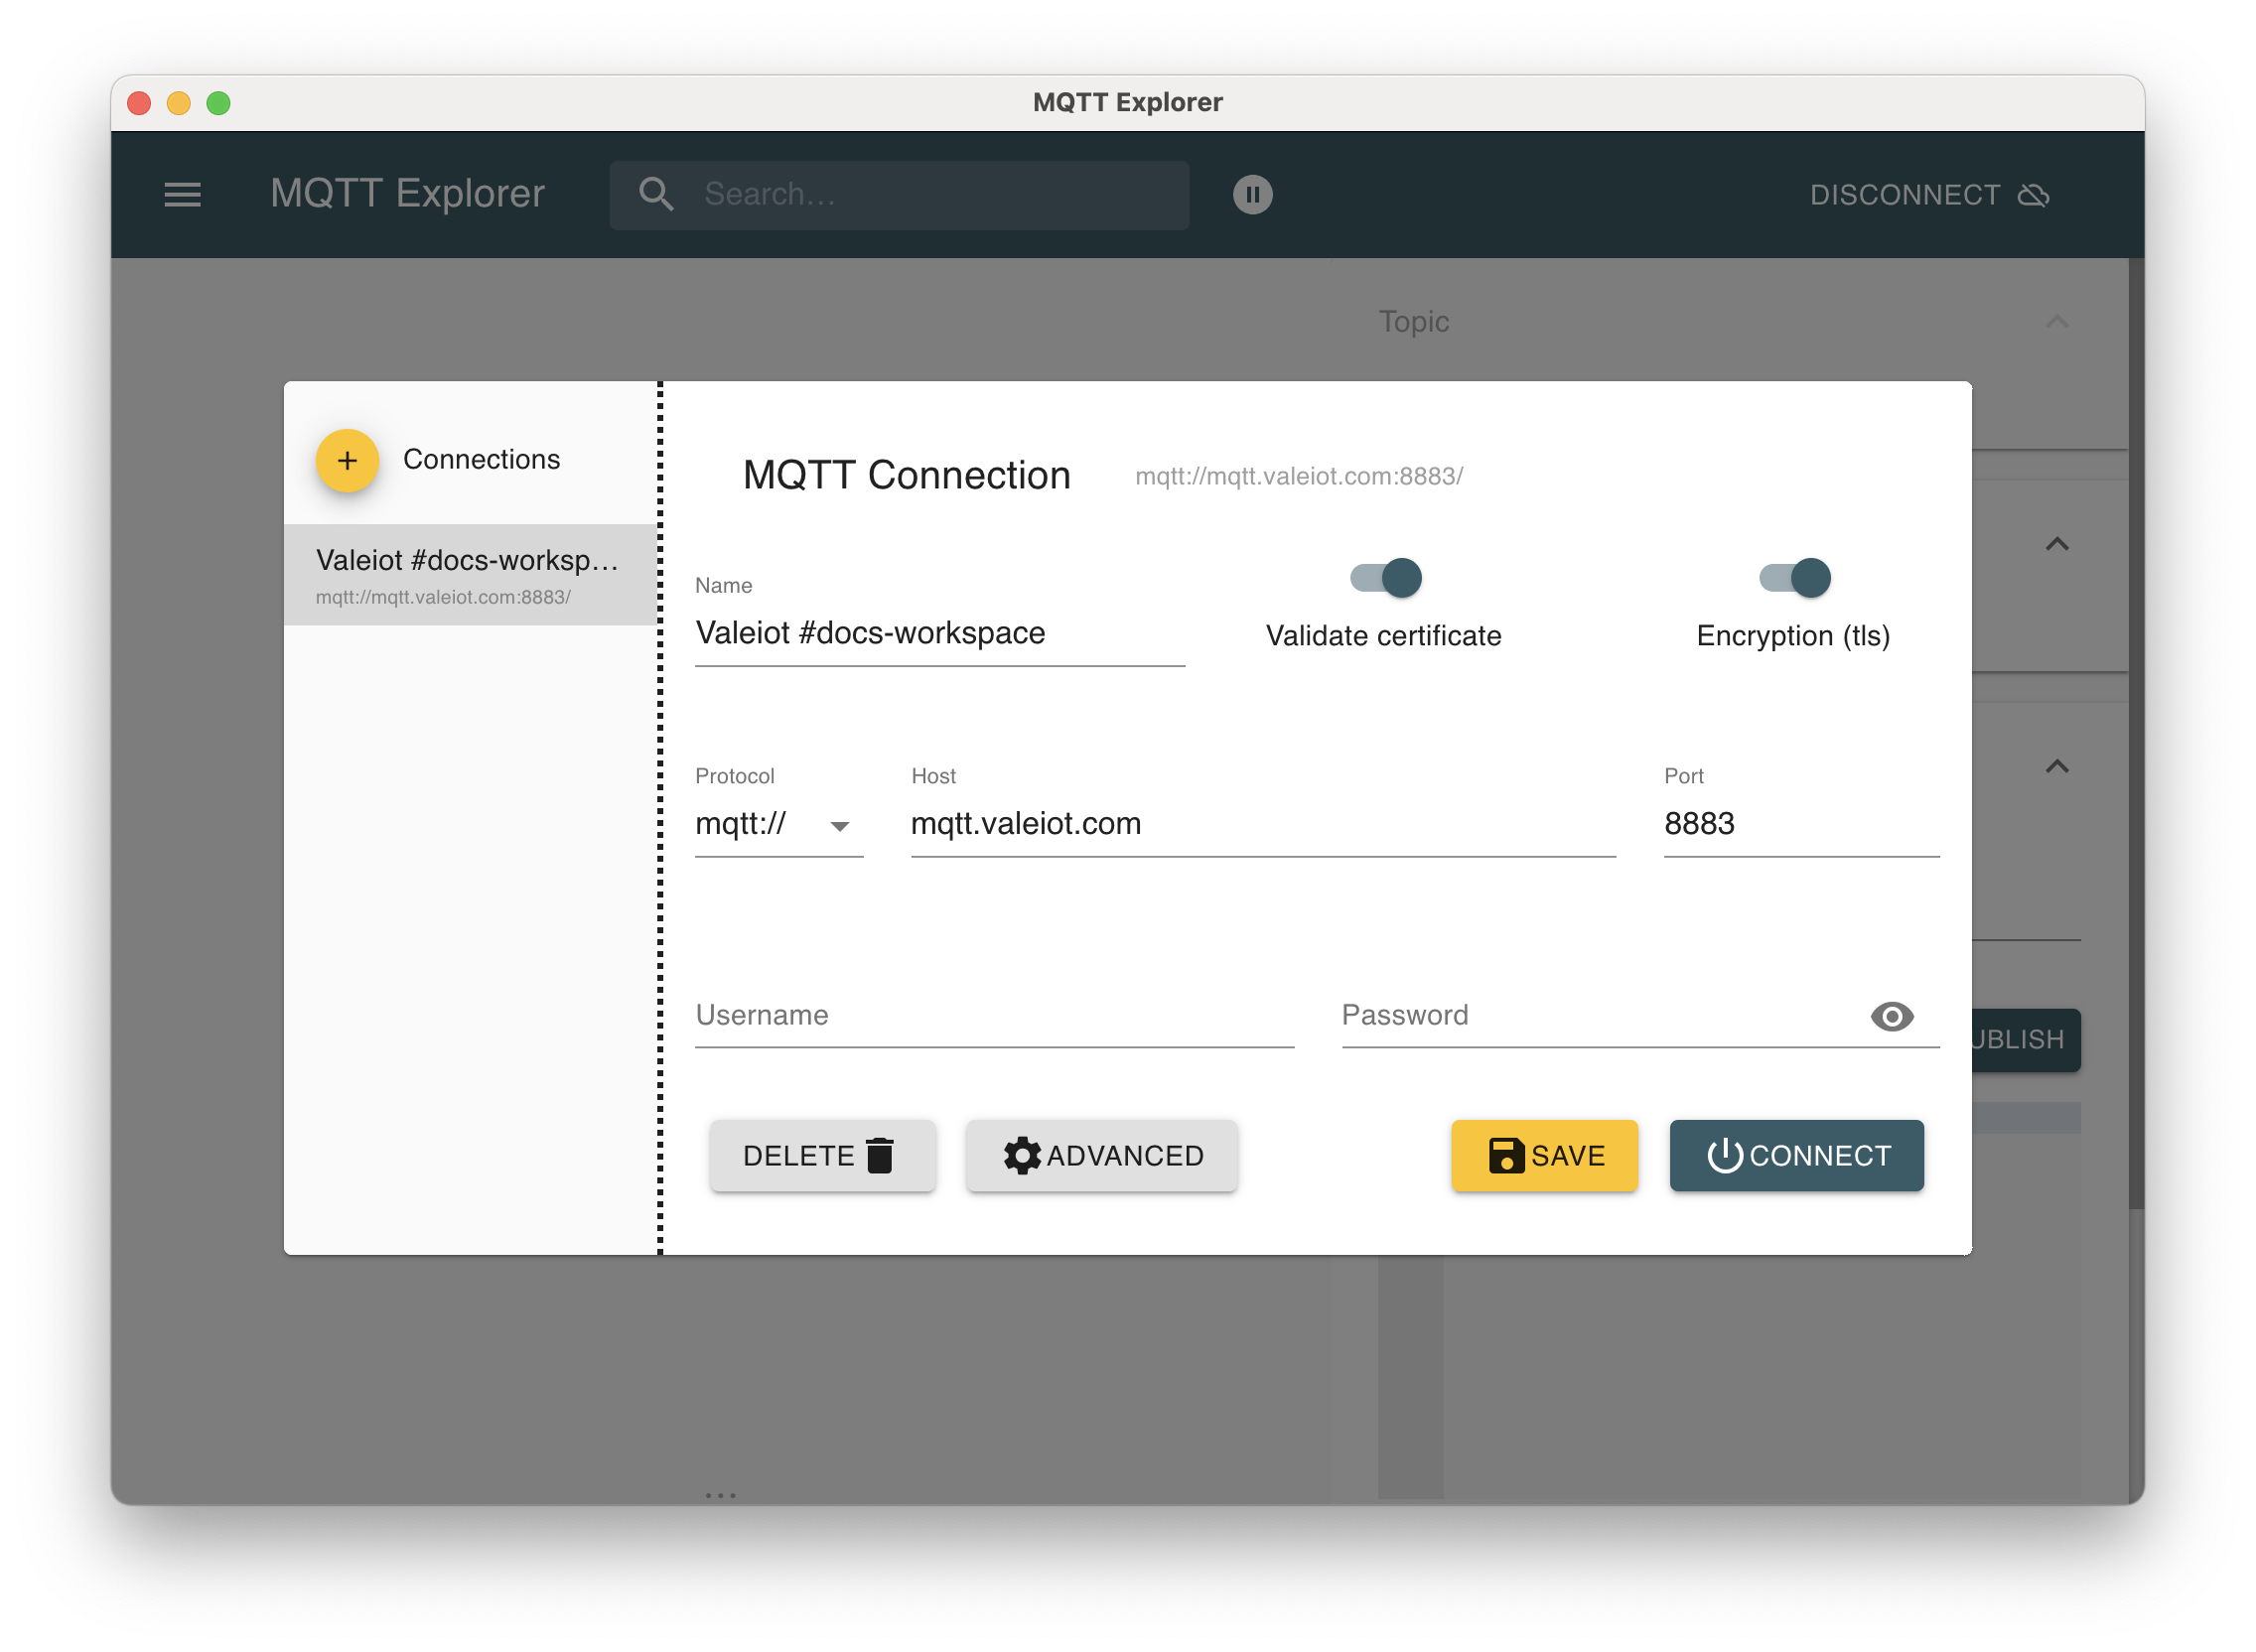
Step 1: Configuring Valeiot MQTT Broker
Use the following connection parameters:
Host: mqtt.valeiot.com
Port: 1883
TLS Port: 8883
- Port 1883 → Standard MQTT (non-encrypted)
- Port 8883 → MQTT over TLS (recommended for production)
For production environments, always use TLS (8883) to ensure encrypted communication.
Step 2: Authentication
Devices can publish data to Valeiot using two authentication methods, choose to authenticate via A or B exaplained below:
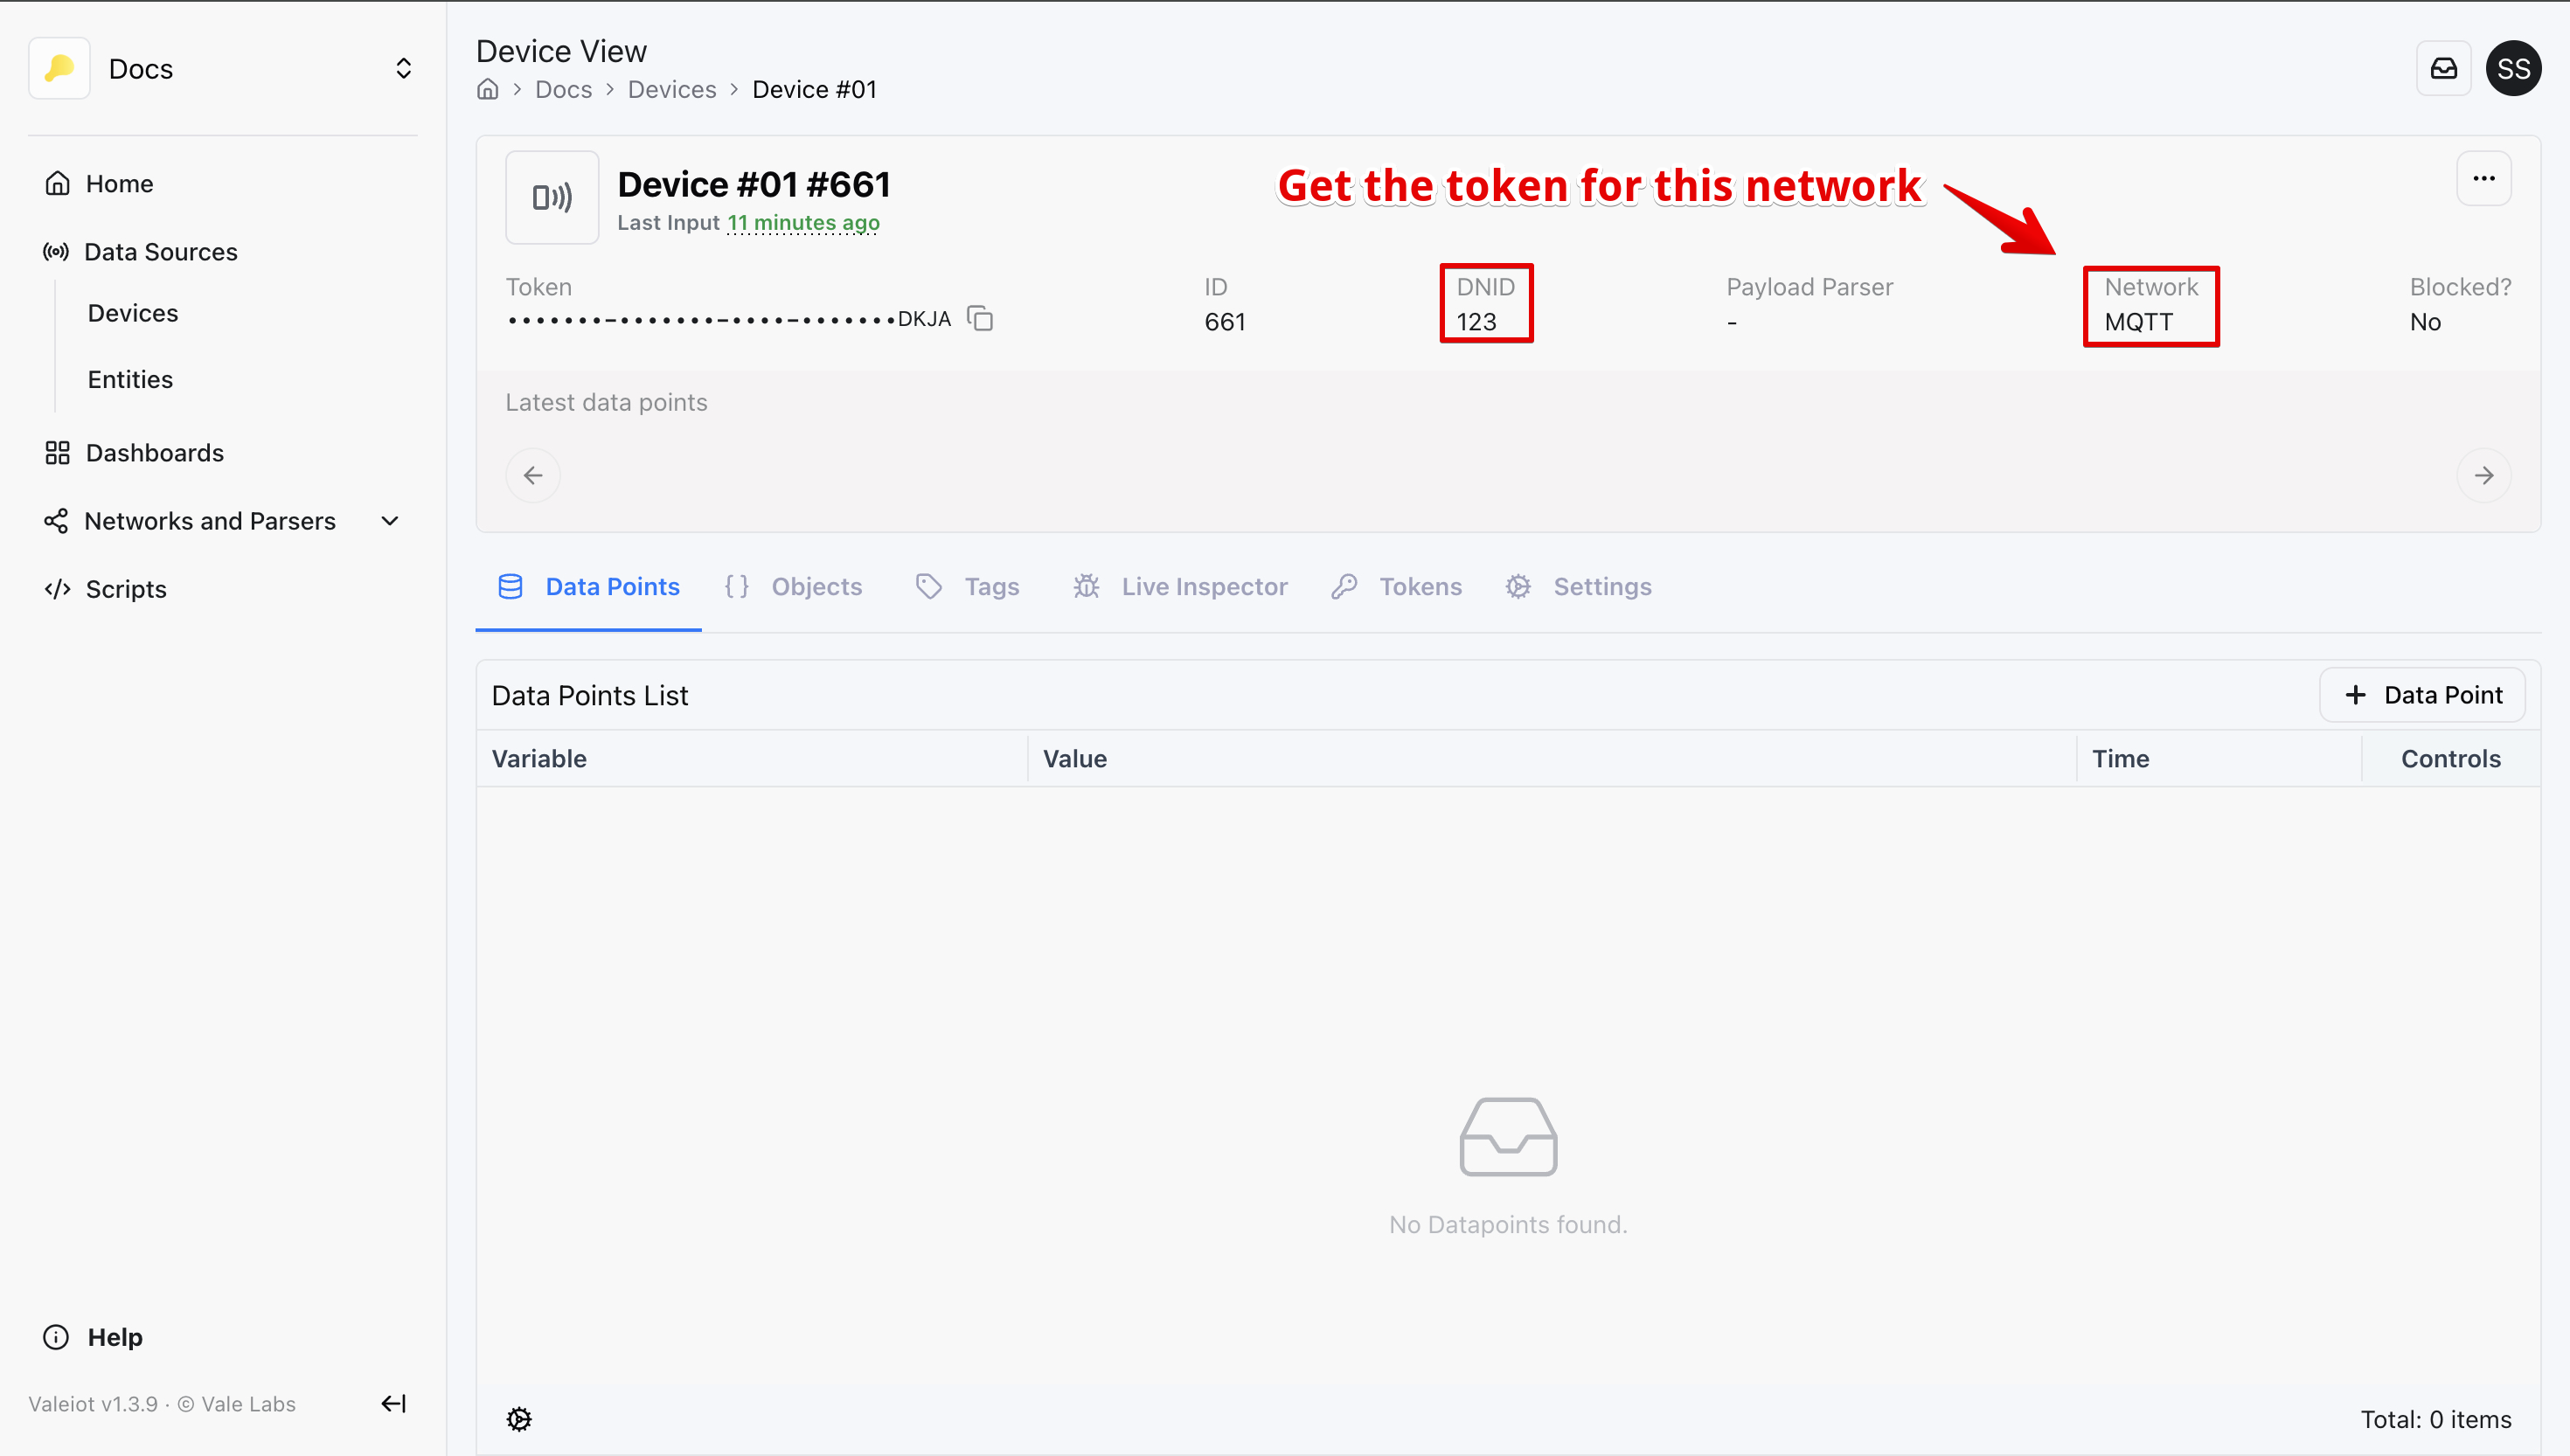
A. Network Token (network level)
Use this method when authenticating with the Data Source Network ID (DNID).
Credentials
Username: DNID (Data Source Network ID)
Password: network:YOUR_NETWORK_TOKEN_HERE
DNID→ Unique identifier of the Data Source in the network (e.g. 123)network_token→ Network authentication token (e.g. us1:FaBs8LCPBRPT7ty9f2TRVdACte78wMJKm0pYyi00lDobXVpb9vGOGAFjgJ2in1)
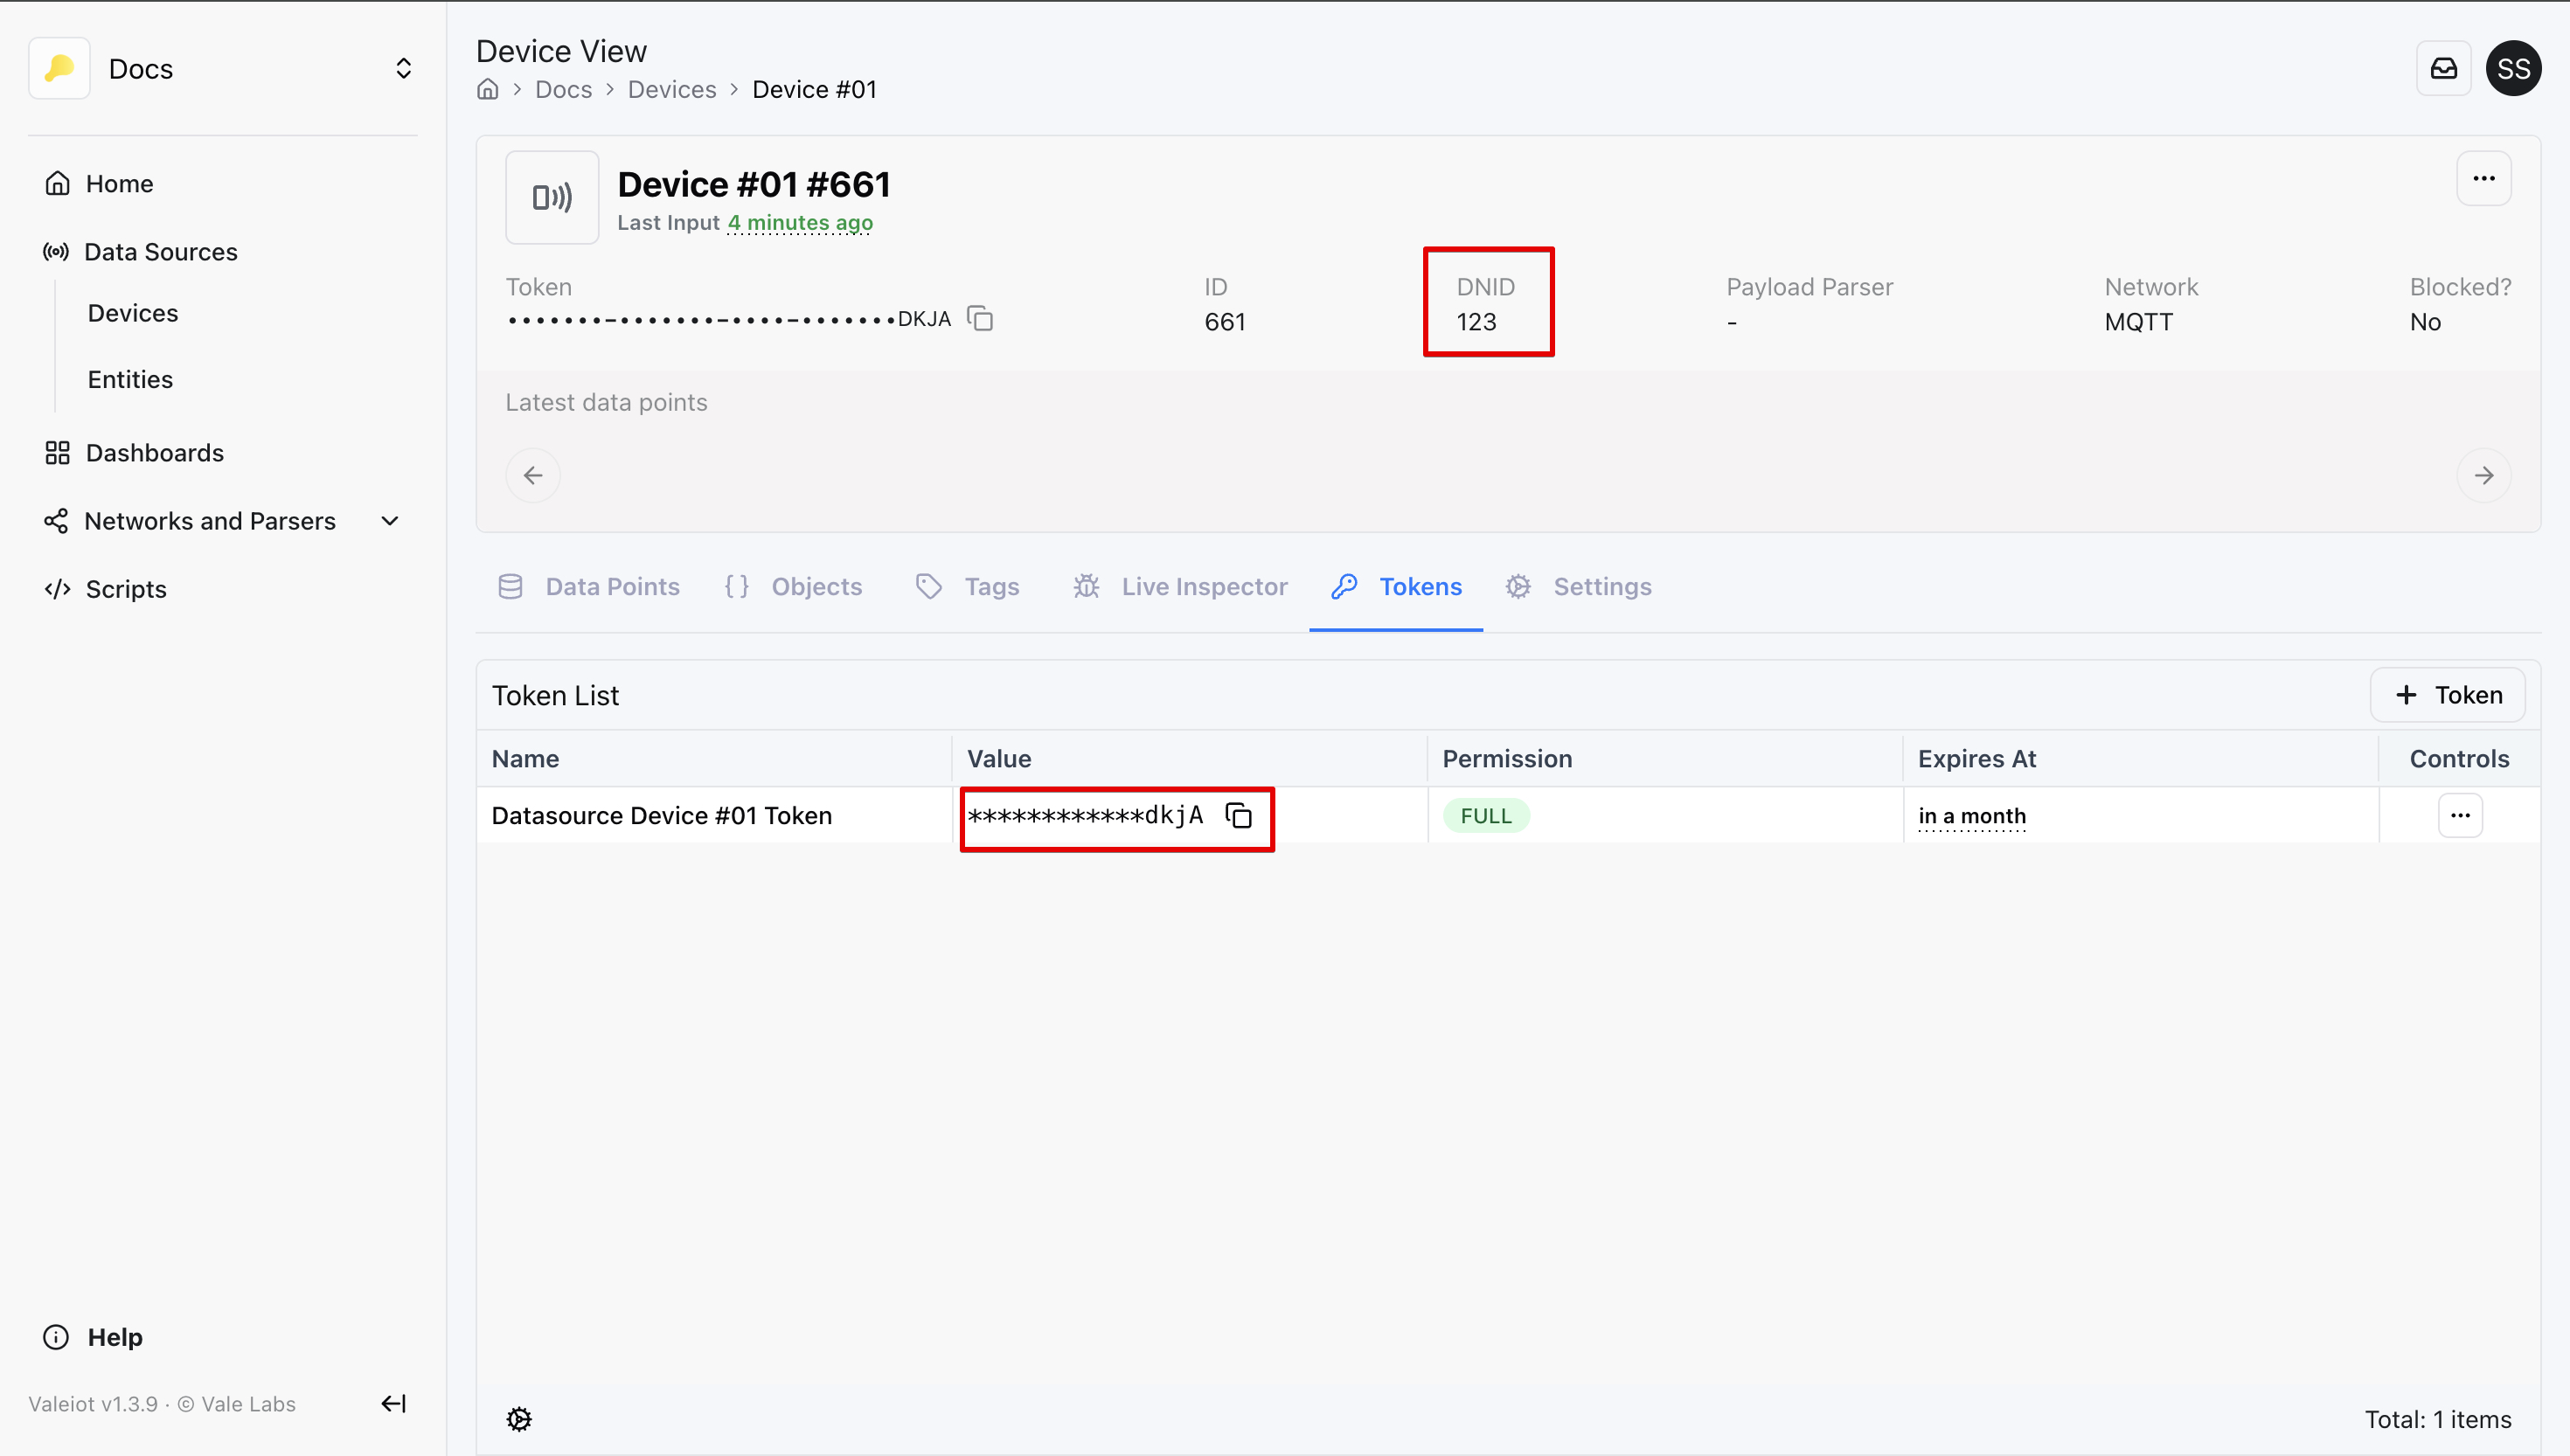
B. Data Source Token (device level)
Use this method when authenticating directly using a Data Source token.
Credentials
Username: client
Password: datasource:server_name:datasource_token
server_name→ Your Valeiot server (e.g.,us1)datasource_token→ Data source authentication token (e.g. datasource:us1:FaBs8LCPBRPT7ty9f2TRVdACte78wMJKm0pYyi00lDobXVpb9vGOGAFjgJ2in2)
Example: Inserting data successfuly as a client
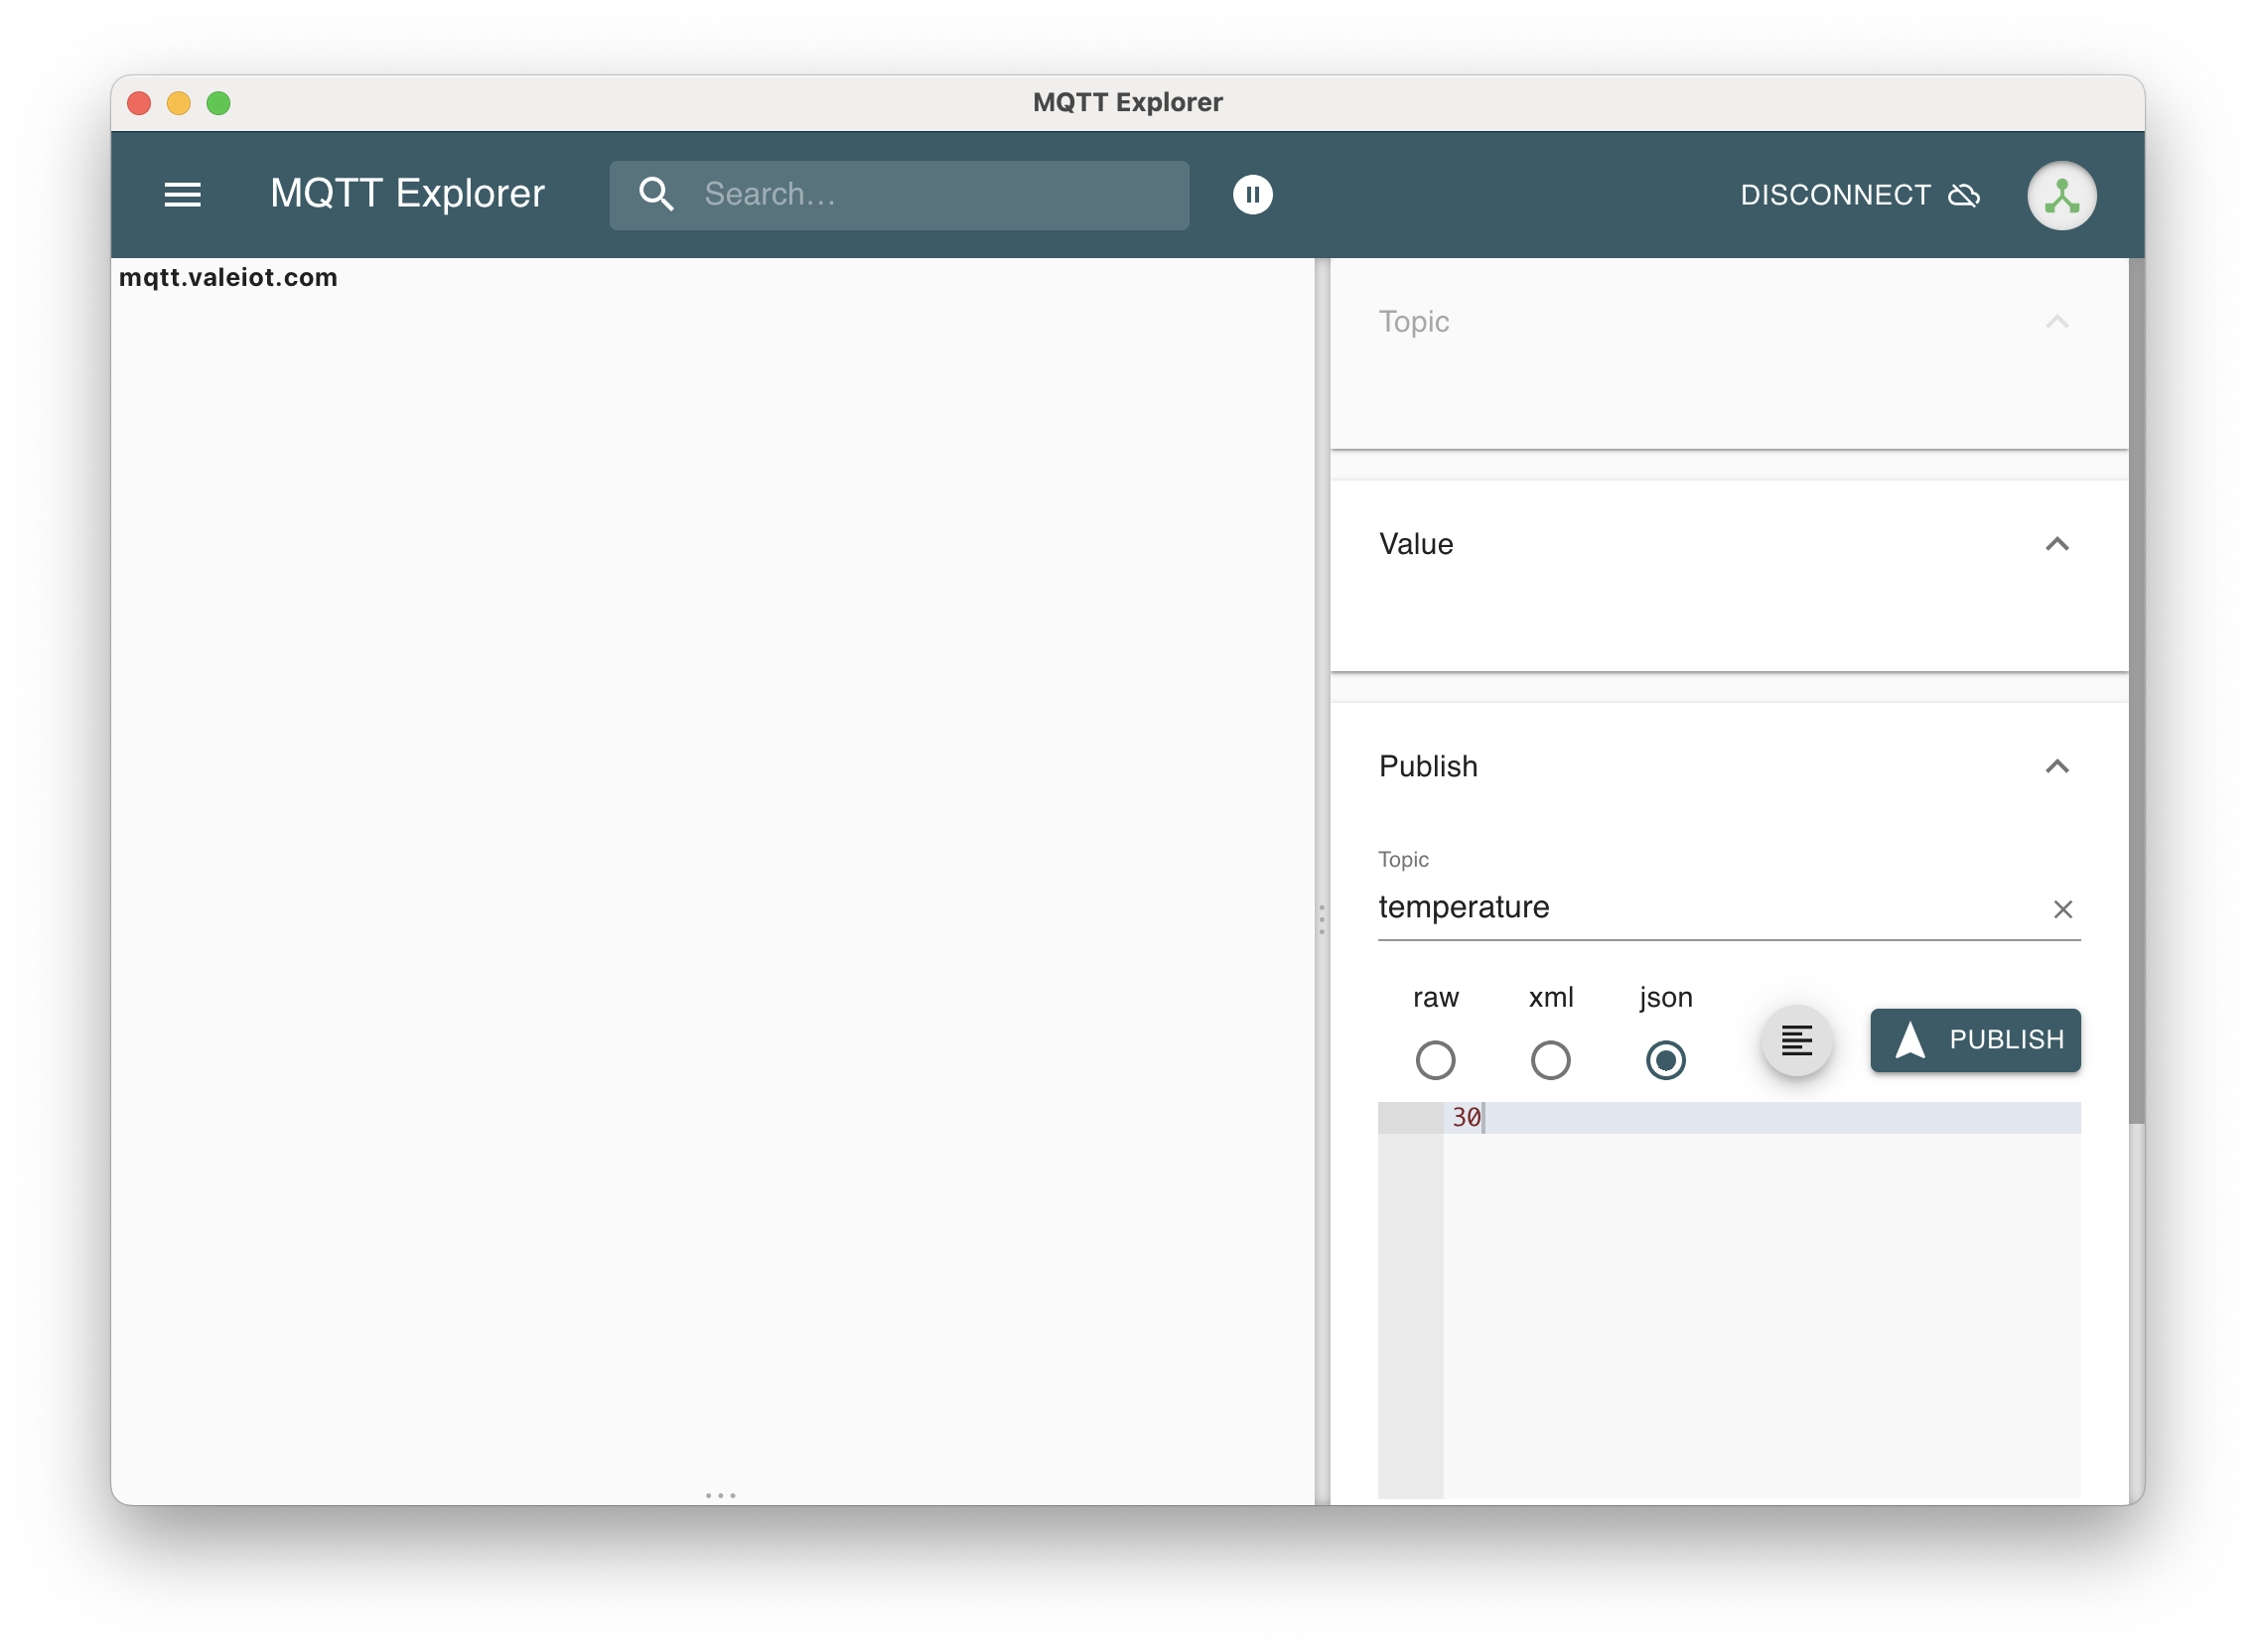
For illustration purposes it's used MQTT explorer as a client to simulate a device, see below:
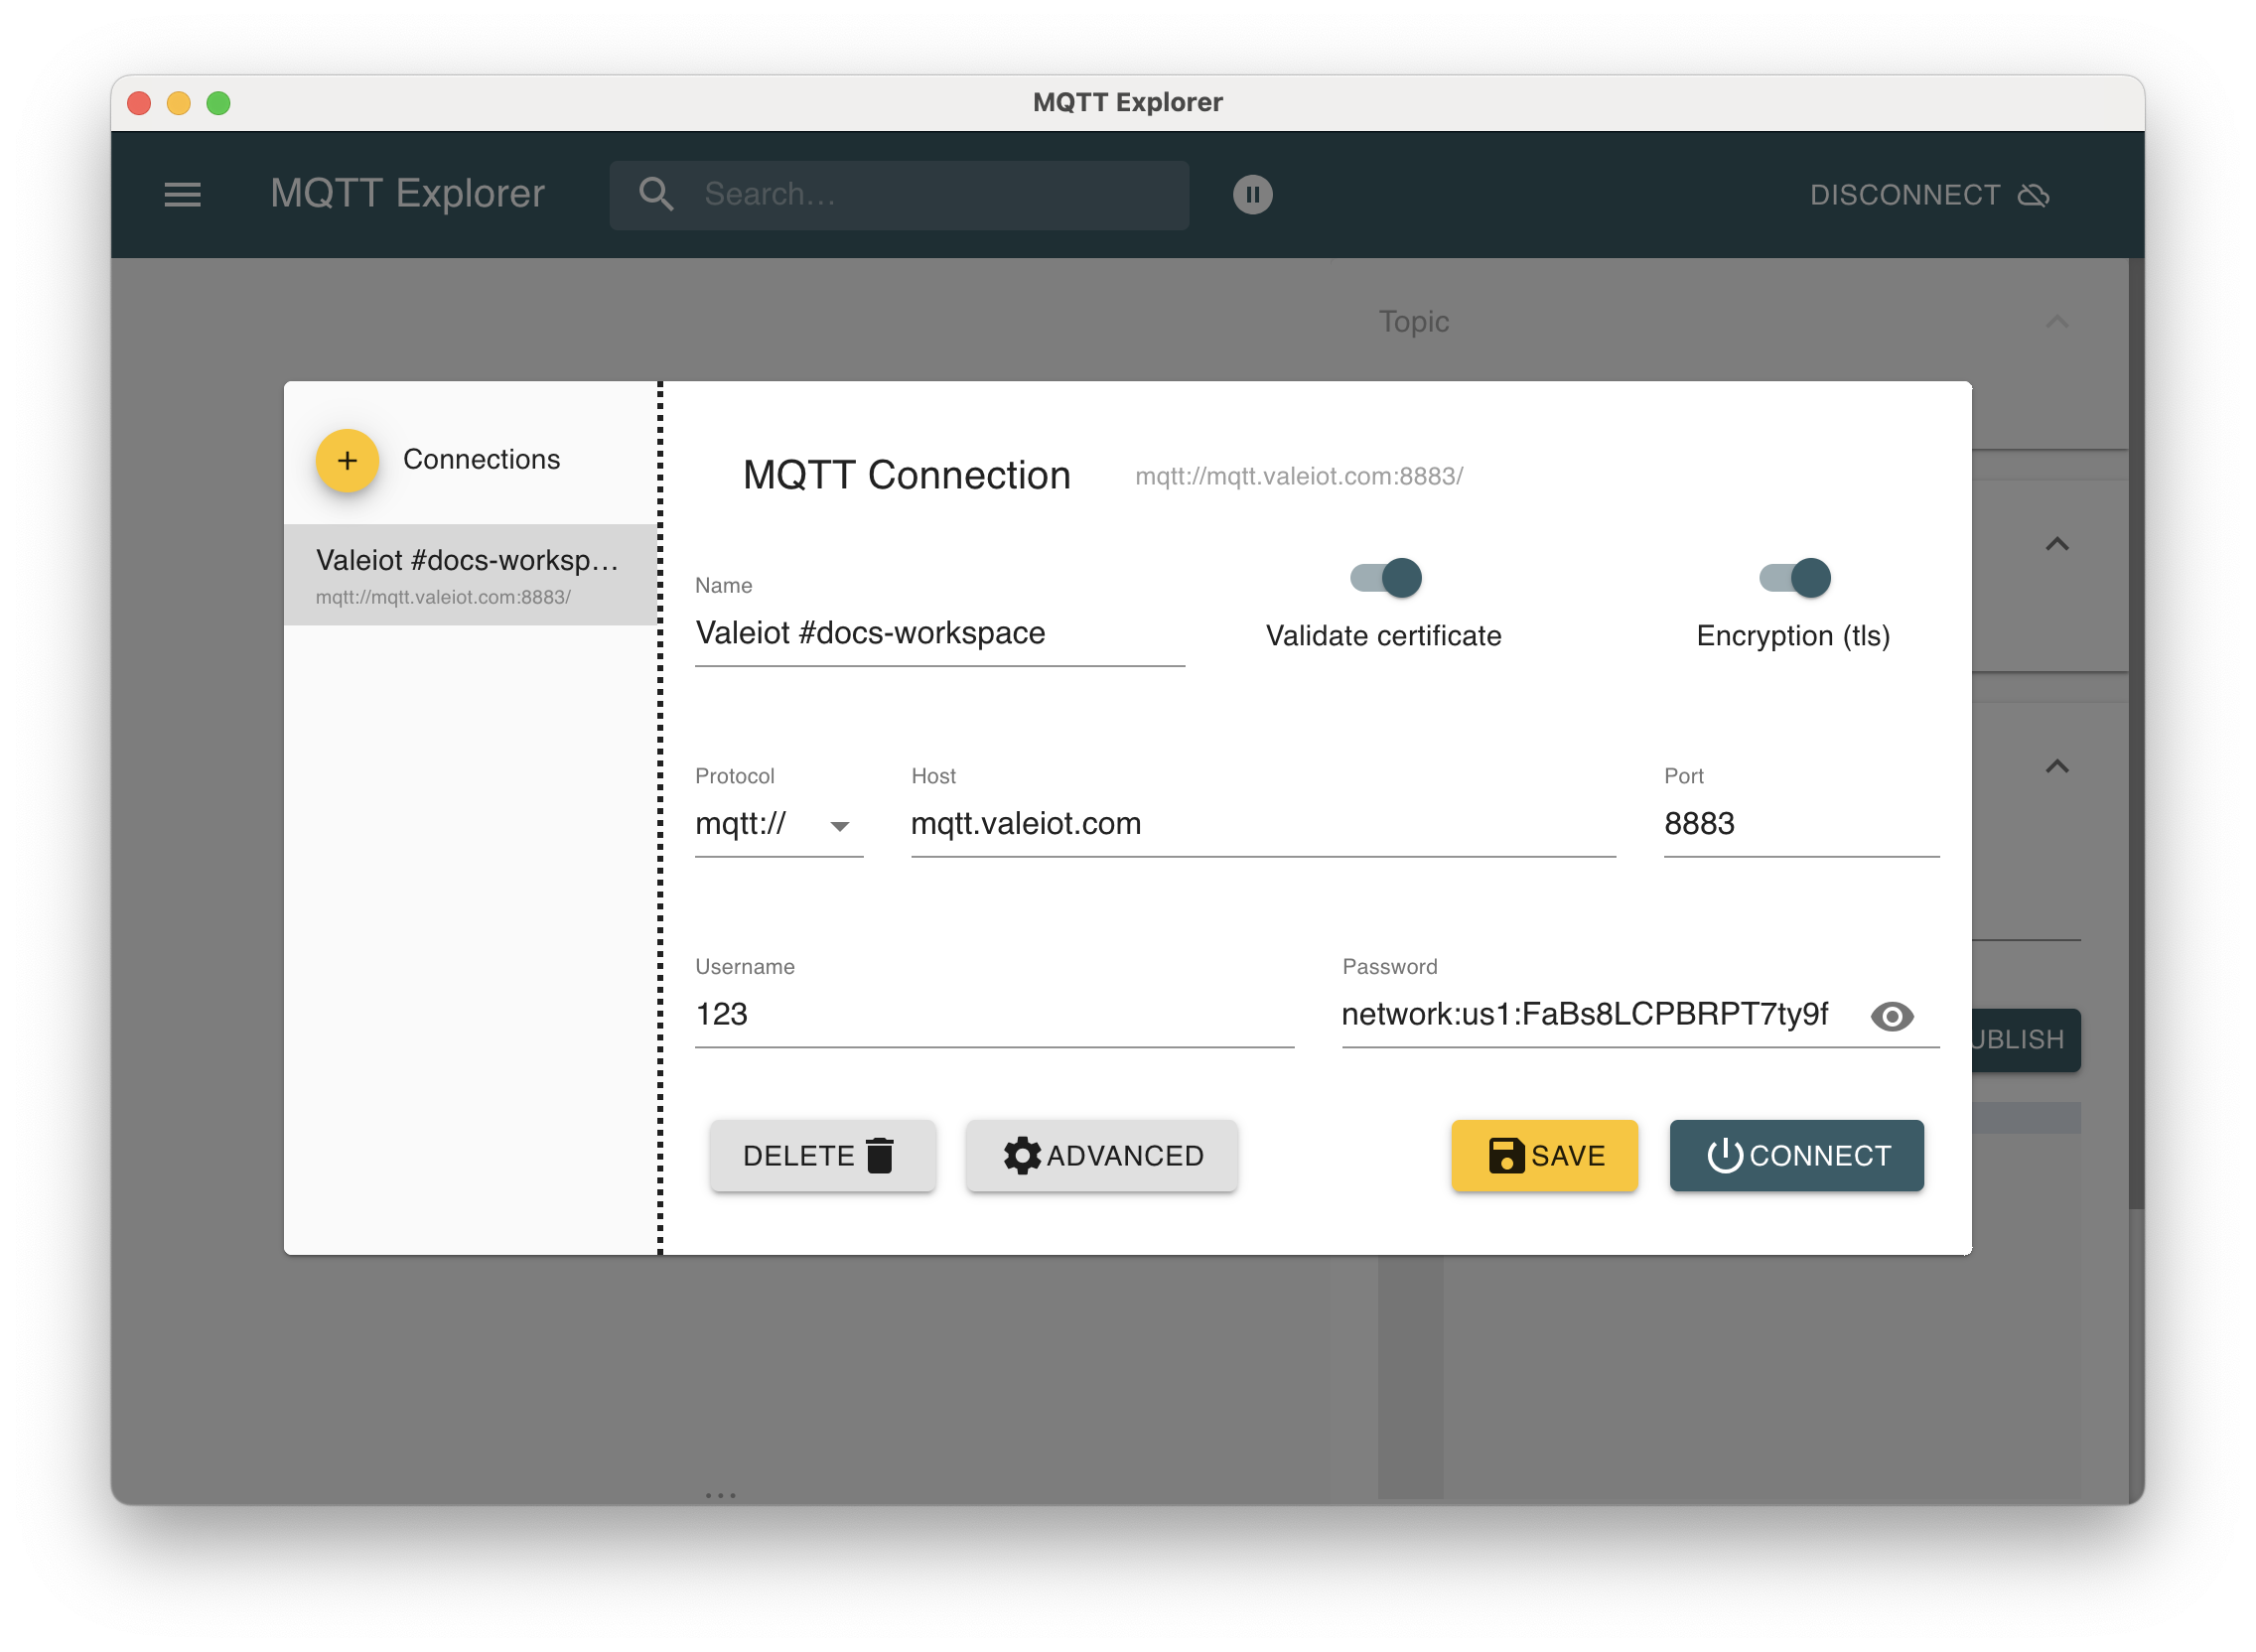
After everything is set, you should see a success client connection to the Valeiot Broker:

Fill up the topic, in this example temperature and value 30.
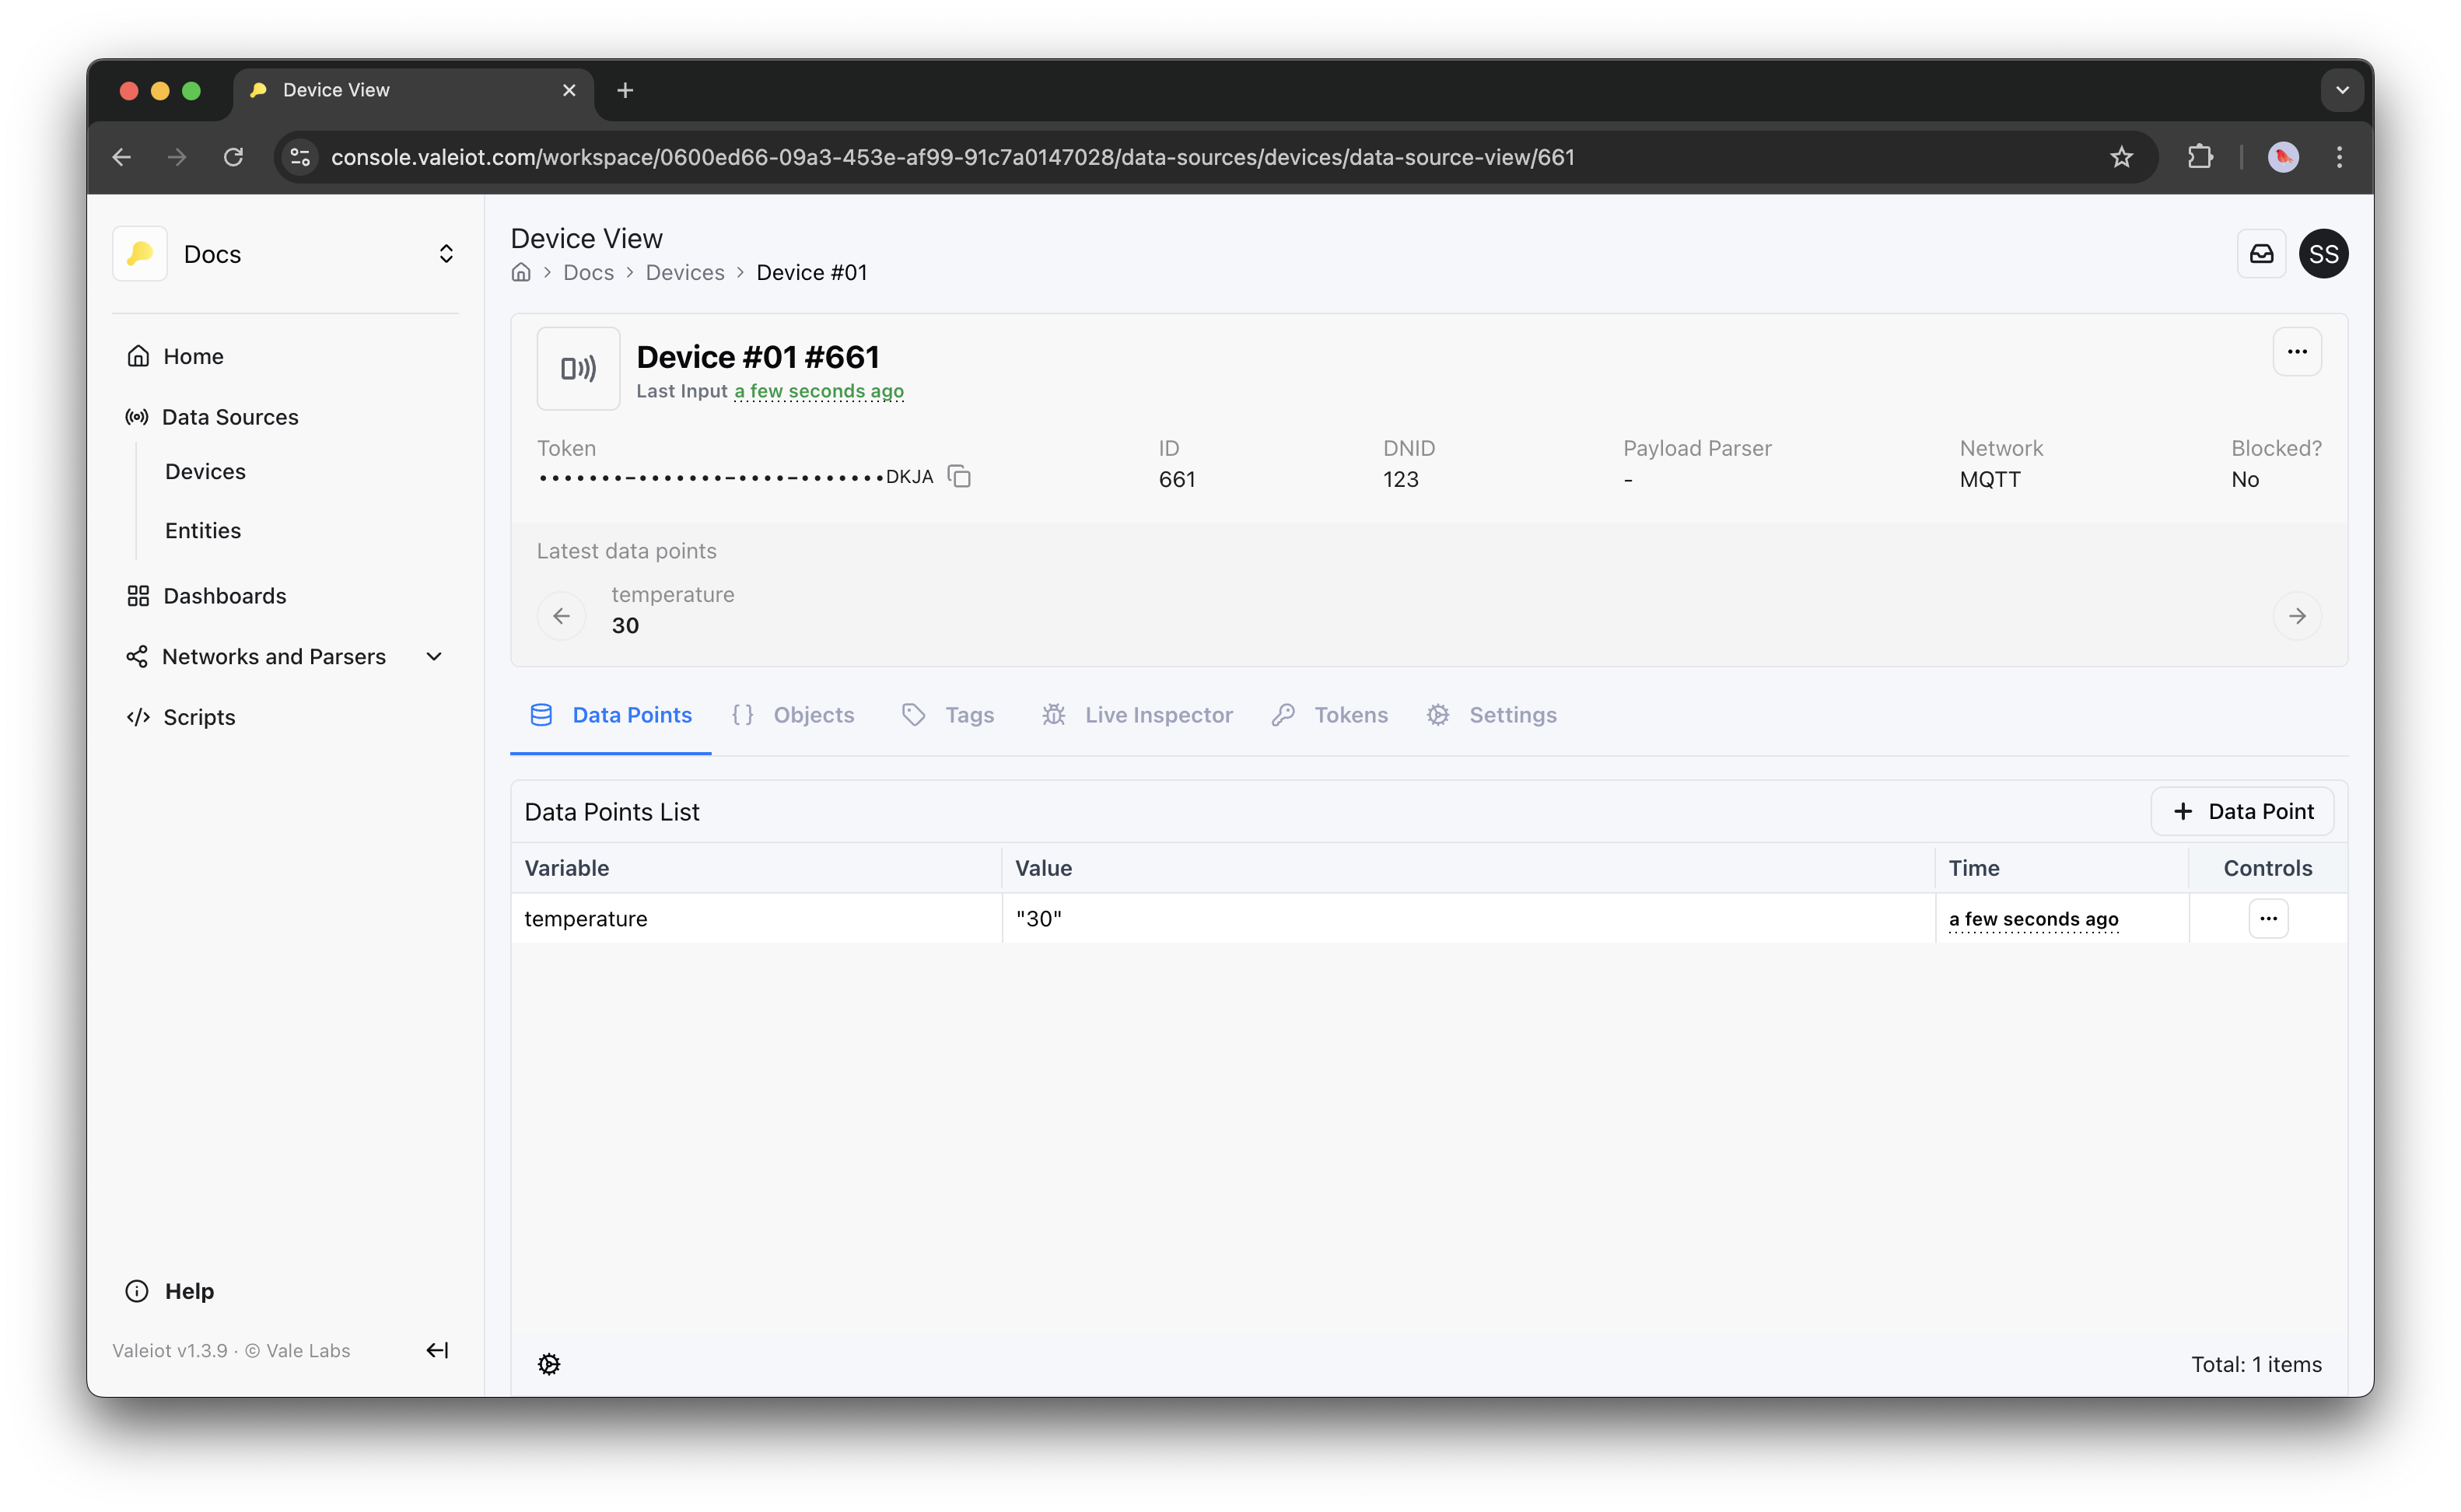
Valeiot will register a Data Point as:
{
  "variable": "temperature", //publish topic
  "value": "30" //publish value
}
Note that, if you wish to customize how your data is inserted (such as changing the vairable name, or decoding bits), you must use a Payload Parser.
Refer to the Payload Parser section to learn more.
Finally, check the data point being inserted in Valeiot:
Still didnt work?
Check the "Live inspector" (under Device > Live Inspector) to see further errors:

Sending Commands to Devices
Commands can be triggered from:
- Dashboard and widgets
- Scripts
- SDK
- Direct API calls
MQTT clients cannot publish directly to another client.
Clients communicate only through the Valeiot broker.
If you need direct client-to-client communication, please contact Valeiot support. We provide dedicated broker solutions for advanced use cases.
Example: Sending Commands Using the Valeiot SDK
In MQTT, all messages are exchanged through topics.
Your hardware must subscribe to the correct topic to receive messages. In the example below the hardware is subscribed to the topic:
{HARDWARE_ID}/SETOUT
{HARDWARE_ID}→ Unique hardware identifier (IMEI, Device ID, EUI, etc.) which usually is set as the DNID (Data Source Network ID).SETOUT→ Command topic (device subscribed to this topic)
To send a command programmatically using the Valeiot SDK:
const result = await conn.mqtt.publish({
  body: {
    networkId: networkId,
    topic: `${dnid}/SETOUT`,
    payload: JSON.stringify(message),
    qos: 0,
    retain: true,
  },
});
Parameters
networkId→ Network ID of your Data Sourcetopic→ MQTT topic your device is subscribed topayload→ Message sent to the device (JSON string)qos→ MQTT Quality of Service level (0, 1, or 2)retain→ If true, broker retains last message for future subscribers
Full Script Example (Dashboard Button Command)
The script bellow is triggered by a button widget from the dashboard. The ON button dispatch the event command/on and the OFF button command/off.
import {
  EventContext,
  Router,
  ScriptEvent,
  WorkspaceConn,
} from "@sibis/valeiot-sdk";

/**
 * handler
 * Creates connection and router, handles the event
 */
export async function handler(ev: ScriptEvent) {
  const conn = new WorkspaceConn();
  const router = buildRouter(conn);

  try {
    return await router.handle(ev);
  } catch (err) {
    console.error("error");
    return err;
  }
}

/**
 * buildRouter
 * Builds router with sendCommand event handler
 */
function buildRouter(conn: WorkspaceConn): Router {
  const router = new Router();
  router.use(async (ctx, _) => ctx.set("conn", conn));

  router.use(async (ctx, _) => {
    try {
      await ctx.next();
    } catch (err) {
      console.error("error", err);
    }
  });

  router.on("command/on", sendCommandHandler);
  router.on("command/off", sendCommandHandler);

  return router;
}

/**
 * sendCommandHandler
 * Triggered by button widget
 */
export async function sendCommandHandler(ctx: EventContext, ev: ScriptEvent) {
  console.log("EVENT:", JSON.stringify(ev, null, 4));
  console.log("Running Valeiot sendCommandHandler");

  const conn: WorkspaceConn = ctx.get("conn");

  const event = ev.event;
  const datasourceId = ev.content?.datasourceId || ev.content?.dss;

  // Getting networkId
  const ds = await conn.datasources.getDetails({
    datasourceId: Number(datasourceId),
  });

  const networkId = ds.network.id;
  const dnid = ds.dnid;

  let message: number;

  if (event === "command/on") {
    console.log("Event: command/on");
    message = 1;
  } else if (event === "command/off") {
    console.log("Event: command/off");
    message = 0;
  } else {
    ctx.result.setFailed();
    ctx.result.set("Error", "Unrecognized event");
    return;
  }

  try {
    const result = await conn.mqtt.publish({
      body: {
        networkId: networkId,
        topic: `${dnid}/SETOUT`,
        payload: JSON.stringify(message),
        qos: 0,
        retain: true,
      },
    });
    console.log("MQTT Publish Result:", result);
  } catch (err) {
    console.error("Error sending command via MQTT:", err);
    ctx.result.setFailed();
    ctx.result.set("Error", "Failed to send command via MQTT");
    return;
  }

  ctx.result.set(
    "Success",
    `Command ${event === "command/on" ? "ON" : "OFF"} sent successfully!`,
  );
}